
This article describes how to balance client connections across Wowza Streaming Engine™ media server software edge server virtual machine instances on Google Compute Engine. A load-balancing configuration uses an origin server virtual machine instance and multiple edge server virtual machine instances in a repeater configuration; one edge server runs the Dynamic Load Balancing AddOn to distribute client connections among the edge server instances.
Getting started
Compute Engine is a Google Cloud Platform web service that provides resizable compute capacity in the cloud and virtualizes computing resources as virtual machines. Wowza Media Systems offers pre-configured and tuned Wowza Streaming Engine images that are ready to use with Google Compute Engine.
Before you can create a Wowza Streaming Engine load-balancing system on the Google Cloud Platform, you must create a new project. Follow the instructions in the article Set up Wowza Streaming Engine on Google Cloud Platform to create a project, add a Wowza Streaming Engine image to the project, and add a firewall rule.
Then, continue with the tasks in this article, which assumes all Google Compute Engine server instances are part of that project.
Create and configure the origin server instance
After creating and configuring a Google Cloud Platform project that contains a Wowza Streaming Engine image, you're ready to create and configure the origin server instance.
Create and start the origin server instance
- In your Google Cloud Platform Console project dashboard, click the navigation menu icon in the upper-left corner of the page, scroll to Compute Engine, and then click Images.
- In the Images list, select your Wowza Streaming Engine image and then click Create instance.
- On the Create an instance page, do the following:
- Enter an instance Name. The name must start with a lowercase letter, be followed by 1 to 62 lowercase letters, numbers, or hyphens, and can't end with a hyphen.
- Select a Region and a Zone. The region and zone determine what computing resources are available and where your data is stored and used.
- Select a Machine type. The machine type determines the CPU and memory your instance will have. Machine types with large scratch disks (or persistent storage) are recommended for on-demand streaming, nDVR, and for recording live streams.
The default, 1 vCPU (n1-standard-1), is the minimum machine type that we recommend. For more information about the types, see Machine Types in the Google Cloud docs.
Notes:
- Wowza Streaming Engine doesn't work with shared-core machine types.
- Each machine type is billed differently. For more information, see Machine type pricing in the Google Cloud docs.
- If desired, change the Boot disk:
- Click Change.
- Select your Wowza Streaming Engine image.
- For Boot disk type, select either SSD persistent disk (the default value) or Standard persistent disk.
- Specify a Size.
- Click Select.
For more information, see Adding Persistent Disks in the Google Cloud docs.
After the operating system and Wowza Streaming Engine are installed, the base machine will have about 8GB of free disk space.
Still on the Create an instance page, provide your Wowza Streaming Engine license key (or keys), specify a startup package, and enter your Wowza Streaming Engine Manager user name and password.
- Click Management, disk, networking, access & security options.
- On the Management tab, under Metadata, enter the following required key-value pair:
| Key | Value |
| WZA_serverLicenseKey | Your valid Wowza Streaming Engine license key. |
- (Optional but recommended) Click Add Item one or more times to add the following additional key-value pairs:
| Key | Value |
| WZA_startupPackageURL | The URL for your startup package, which should look something like this: http://storage.googleapis.com/wowzamediasystems/com/wowza/startup/4.0.0/live.zip. Remember, if you don't specify a startup package, the default (live and VOD) package is used. |
| WZA_managerUsername | Your valid Wowza Streaming Engine user name. |
| WZA_managerPassword | Your valid Wowza Streaming Engine password. |
Finally, reserve a static IP for the instance. We recommend using a static IP address instead of an emphemeral IP address for load-balancing configurations.
- Click the Networking tab.
- Click the edit icon (the pencil) for Network interfaces.
- For External IP, select Create IP address.
- Enter a Name and an optional Description for a new static IP address.
- Click Reserve and then click Done.
- Click Create at the bottom of the Create an instance page to create and start the instance.
Make a note of the instance's external IP address. You'll need it for other tasks in this article.
Configure the origin server instance
With the newly deployed origin server instance up and running, sign in to Wowza Streaming Engine Manager and create a live stream repeater application for the origin server.
- Sign in to Wowza Streaming Engine Manager on the origin server instance by using the URL
http://[Google-Cloud-Platform-instance-external-ip-address]]:8088/enginemanager
- Complete the steps in the article Configure a live stream repeater in Wowza Streaming Engine to create a liveorigin application on the origin server.
Create and configure an edge server instance
Next, create and configure an edge server to receive client requests from the load balancer server (which we'll create and configure after).
Note: You may need to create multiple edge servers, depending on your anticipated load. You can repeat this process to create as many as necessary.
Create and start an edge server instance
Repeat the task Create and start the origin server instance, above, to create and start a new instance to use as the edge server.
Configure an edge server instance
With the newly deployed edge server instance up and running, sign in to Wowza Streaming Engine Manager and create a live stream repeater application for the edge server.
- Sign in to Wowza Streaming Engine Manager on the edge server instance by using the URL
http://[Google-Cloud-Platform-instance-external-ip-address]]:8088/enginemanager
- Complete the steps in the article Configure a live stream repeater in Wowza Streaming Engine to create a Live Edge application on the edge server.
Download and install the Dynamic Load Balancing AddOn on the edge server instance
Every edge server instance must run the Dynamic Load Balancing AddOn.
- In the Google Cloud Platform Console, click the navigation menu icon in the upper-left corner of the page, scroll to Compute Engine, and click VM instances.
- Select your edge server from the list of VM instances.
- At the top of the selected instance page, click SSH.
- In the SSH Terminal window, do the following:
- Copy the Load Balancer package to the edge server:
sudo wget http://www.wowza.com/downloads/forums/loadbalancer/LoadBalancer_4.0.zip -P /usr/local/
- Change directory to /usr/local:
cd /usr/local/
- Unzip the LoadBalancer package:
sudo unzip LoadBalancer_4.0.zip -d/usr/local/LoadBalancer
- Copy the /usr/local/LoadBalancer/lib/wms-plugin-loadbalancer.jar file to the [install-dir]/lib/ folder in the Wowza Streaming Engine installation:
sudo cp /usr/local/LoadBalancer/lib/wms-plugin-loadbalancer.jar /usr/local/WowzaStreamingEngine/lib/
- Restart Wowza Streaming Engine:
/etc/init.d/WowzaStreamingEngine restart
- Close the SSH Terminal window.
- Copy the Load Balancer package to the edge server:
Add the load balancer server listener
Every edge server instance requires a load balancer server listener.- In Wowza Streaming Engine Manager on the edge server, click the Server tab and then click Server Setup in the contents panel.
- On the details page, click the Server Listeners tab.
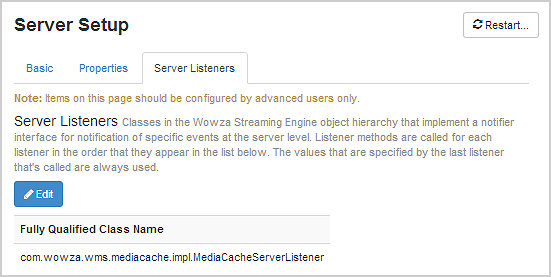
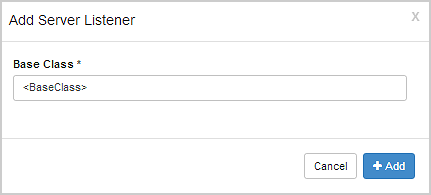
- Click Edit and then click Add Server Listener.
- In the Add Server Listener dialog box, for Base Class, enter the fully qualified class name com.wowza.wms.plugin.loadbalancer.general.LoadBalancerServer and then click Add.
- Click Save and then restart Wowza Streaming Engine.


Add load-balancing properties to the edge server instance
Every edge server instance requires specific load-balancing properties.Add load-balancing properties for the edge server in Wowza Streaming Engine Manager
- In Wowza Streaming Engine Manager on the edge server instance, click the Server tab.
- On the Server Setup page Properties tab, click Custom in the Quick Links bar.
Note: Access to the Properties tab is limited to administrators with advanced permissions. For more information, see Enable access to advanced administrative settings. - In the Custom area, click Edit.
- Click Add Custom Property, specify the following settings in the Add Custom Property dialog box, and then click Add:
- Path – Select Root/Path.
- Name – Enter loadbalanceType.
- Type – Select String.
- Value – Enter Client. In the load-balancing configuration, servers that fulfill client requests that are directed to it from the load balancer server have the value Client.
- Path – Select Root/Path.
- Repeat for each of the following properties:
PathNameTypeValueNotesRoot/Server loadbalanceKey String 1234abcd Enables encrypted communication between the Load Balancer and servers. The value must be at least eight characters long and must be the same on all servers in the configuration. Root/Server loadbalanceServerIP String x.x.x.x IP address of the Load Balancer Server Instance. Root/Server loadbalanceServerPort String 1935 Port that the Load Balancer runs on. By default, this should be set to 1935 or to any other port that's configured in your VHost.xml file. Root/Server loadbalanceBandwidthEnable String On Controls bandwidth monitoring. The default value is Off. To enable bandwidth monitoring, set this value to On, and then configure the loadbalanceBandwidthLimit property. Root/Server loadbalanceBandwidthLimit String 50000 The bandwidth limit for this server, in kilobits per second (kbps). For example, if you want this server to provide only 50 megabits per second (Mbps) of throughput, set the value to 50000. To allow unlimited bandwidth, set to 0.
If all servers in the load-balancing deployment are saturated, redirection will fail and you must add an additional load-balancing server to increase capacity.Root/Server loadbalanceConnectionEnable String On Controls connection balancing. The default value is Off. To enable connection balancing, set this value to On, and then configure the loadbalanceConnectionLimit property. Root/Server loadbalanceConnectionLimit String 100 The limit for outgoing connection on this server. To allow an unlimited number of connections, set to 0.
If all servers in the load-balancing deployment are servicing the maximum number of connections, redirection will fail and you must add an additional load-balancing server to increase capacity. - Click Save and restart Wowza Streaming Engine to apply the changes.
Add load-balancing properties for the edge server in XML
Alternatively, you can add the load-balancing properties directly to the Server.xml file for the edge server instance.
- In the Google Cloud Platform Console, click the navigation menu icon in the upper-left corner of the page, scroll to Compute Engine, and the click VM instances.
- Select the edge server from the list of VM instances.
- At the top of the instance page, click SSH.
- In a text editor, edit the [install-dir]/conf/Server.xml and insert the following properties in the <Properties> list at the bottom of the file:
<!-- Properties defined here will be added to the IServer.getProperties() collection -->
<Property>
    <Name>loadbalanceType</Name>
    <Value>Client</Value>
    <Type>String</Type>
</Property>
<Property>
    <Name>loadbalanceKey</Name>
    <Value>[eight-character key]</Value>
    <Type>String</Type>
</Property>
<Property>
    <Name>loadbalanceServerIP</Name>
    <Value>[Load balancer (not this server) IP address (xxx.xxx.xxx.xxx)]</Value>
    <Type>String</Type>
</Property>
<Property>
    <Name>loadbalanceServerPort</Name>
    <Value>1935</Value>
    <Type>String</Type>
</Property>
<Property>
    <Name>loadbalanceBandwidthEnable</Name>
    <Value>On</Value>
    <Type>String</Type>
</Property>
<Property>
    <Name>loadbalanceBandwidthLimit</Name>
    <Value>50000</Value>
    <Type>String</Type>
</Property>
<Property>
    <Name>loadbalanceConnectionEnable</Name>
    <Value>On</Value>
    <Type>String</Type>
</Property>
<Property>
    <Name>loadbalanceConnectionLimit</Name>
    <Value>100</Value>
    <Type>String</Type>
</Property>
Note: See the Wowza Dynamic Load Balancing AddOn User's Guide for details about these and other properties. - Modify the loadbalancerServerIP and loadbalanceKey properties to use the appropriate IP address and key. The other properties can be used without modification or modified as needed.
- Restart Wowza Streaming Engine:
/etc/init.d/WowzaStreamingEngine restart
- Close the SSH Terminal window.
Create and configure the load balancer edge server
A load-balancing configuration requires a Wowza Streaming Engine load balancer server that directs client connections to the various Wowza Streaming Engine edge servers that handle the connections. The edge servers periodically send load and status information to the load balancer so that it can track edge server load and availability. All communication between the edge servers and the load balancer is encrypted and signed.
The load balancer server is just another edge server, with different server properties and two HTTP providers. To create and configure the load balancer server, repeat the tasks in Create and configure the edge server instance, above, to:
- Create and start a new edge server instance,
- Configure a Live Edge application on it,
- Download and install the Dynamic Load Balancing AddOn package on it, and
- Add the load balancer server listener.
Then, complete the following tasks to add the load-balancing server properties and the HTTP provider to the load balancer edge server instance.
Add load-balancing properties for the load balancer edge server instance
Add load-balancing properties for the load balancer edge server in Wowza Streaming Engine Manager
- In Wowza Streaming Engine Manager for the load balancer edge server, click the Server tab.
- On the Server Setup page Properties tab, click Custom in the Quick Links bar.
Note: Access to the Properties tab is limited to administrators with advanced permissions. For more information, see Manage credentials. - In the Custom area, click Edit.
- Click Add Custom Property, specify the following settings in the Add Custom Property dialog box, and then click Add:
- Path – Select Root/Path.
- Name – Enter loadbalanceType.
- Type – Select String.
- Value – Enter Server or Server,Client. In the load-balancing configuration, servers that redirect client requests to load-balancing edge servers have a the value Server. Servers that both redirect client requests and fulfill client requests have the value Server,Client.
- Path – Select Root/Path.
- Repeat for each of the following properties:
PathNameTypeValueNotesRoot/Server loadbalanceKey String 1234abcd Enables encrypted communication between the Load Balancer and servers. The value must be at least eight characters long and must be the same on all servers in the configuration. Root/Server loadbalanceServerIP String x.x.x.x IP address of the Load Balancer Server Instance. Root/Server loadbalanceServerPort String 1935 Port that the Load Balancer runs on. By default, this should be set to 1935 or to any other port that's configured in your VHost.xml file. Root/Server loadbalanceDecisionOrder String Bandwidth,Connection Order in which decision-making is processed for load balancing. Some or all of the following values can be entered as a comma-separated list:
Geographic - Select load-balancing servers based on the geographic selector.
Bandwidth - Select load-balancing servers based on the bandwidth selector.
Connection - Select load-balancing servers based on the connection selector.
For example, to specify geographic-based and then connection-based load balancing, the value is:
Geographic,Connection.Root/Server loadbalanceIgnoreClients String FMLE A comma-separated list of client names. Clients with these names can connect to the Load Balancer and not be redirected. For example, you can specify the client name FMLE to enable a client that has Flash Media Encoder installed to connect. Root/Server loadbalanceBandwidthEnable String On Controls bandwidth monitoring. The default value is Off. To enable bandwidth monitoring, set this value to On, and then configure the loadbalanceBandwidthLimit property. Root/Server loadbalanceBandwidthLimit String 50000 The bandwidth limit for this server, in kilobits per second (kbps). For example, if you want this server to provide only 50 megabits per second (Mbps) of throughput, set the value to 50000. To allow unlimited bandwidth, set to 0.
If all servers in the load-balancing deployment are saturated, redirection will fail and you must add an additional load-balancing Server to increase capacity.Root/Server loadbalanceConnectionEnable String On Controls connection balancing. The default value is Off. To enable connection balancing, set this value to On, and then configure the loadbalanceConnectionLimit property. Root/Server loadbalanceConnectionLimit String 100 The limit for outgoing connection on this server. To allow an unlimited number of connections, set to 0.
If all servers in the load-balancing deployment are servicing the maximum number of connections, redirection will fail and you must add an additional load-balancing server to increase capacity.Root/Server loadbalanceAllowRemoteClientShutdown String On (Optional) Enables load-balancing servers to be shut down via the Statistics web interface. - Click Save and restart Wowza Streaming Engine to apply the changes.
Add load-balancing properties for the load balancer edge server in XML
Alternatively, you can add the load-balancing properties directly to the Server.xml file for the load balancer server.
- In the Google Cloud Platform Console, click the navigation menu icon in the upper-left corner of the page, scroll to Compute Engine, and the click VM instances.
- Select the load balancer server from the list of VM instances.
- At the top of the instance page, click SSH.
- In a text editor, edit the [install-dir]/conf/Server.xml file, and insert the following properties in the <Properties> list at the bottom of the file:
<Property> <Name>loadbalanceType</Name> <Value>Server</Value> <Type>String</Type> </Property> <Property> <Name>loadbalanceKey</Name> <Value>1234abcd</Value> <Type>String</Type> </Property> <Property> <Name>loadbalanceServerIP</Name> <Value>[Load Balancer IP address (x.x.x.x)]</Value> <Type>String</Type> </Property> <Property> <Name>loadbalanceServerPort</Name> <Value>1935</Value> <Type>String</Type> </Property> <Property> <Name>loadbalanceDecisionOrder</Name> <Value>Bandwidth,Connection</Value> <Type>String</Type> </Property> <Property> <Name>loadbalanceIgnoreClients</Name> <Value>FMLE</Value> <Type>String</Type> </Property> <Property> <Name>loadbalanceBandwidthEnable</Name> <Value>On</Value> <Type>String</Type> </Property> <Property> <Name>loadbalanceBandwidthLimit</Name> <Value>50000</Value> <Type>String</Type> </Property> <Property> <Name>loadbalanceConnectionEnable</Name> <Value>On</Value> <Type>String</Type> </Property> <Property> <Name>loadbalanceConnectionLimit</Name> <Value>100</Value> <Type>String</Type> </Property> <Property> <Name>loadbalanceAllowRemoteClientShutdown</Name> <Value>On</Value> <Type>String</Type> </Property> - Modify the loadbalancerServerIP and loadbalanceKey properties to use the appropriate IP address and key. The other properties can be used without modification or modified as needed.
- Restart Wowza Streaming Engine:
/etc/init.d/WowzaStreamingEngine restart/
- Close the SSH Terminal window.
Add the HTTP providers to the load balancer edge server instance
Finally, add the LoadBalancerPublicInterface and LoadBalancerInterface HTTP providers to the load balancer edge server instance.
- In the Google Cloud Platform Console, click the navigation menu icon in the upper-left corner of the page, scroll to Compute Engine, and the click VM instances.
- Select the load balancer edge server from the list of VM instances.
- At the top of the instance page, click SSH.
- In a text editor, edit the [install-dir]/conf/VHost.xml file, and add the following HTTP providers to the top of the <HTTPProviders> list for the default streaming host port. Make sure these HTTP providers are the first entries in the <HTTPProviders> list:
<HTTPProvider>
    <BaseClass>com.wowza.wms.plugin.loadbalancer.http.LoadBalancerPublicInterface</BaseClass>
    <RequestFilters>redirect*</RequestFilters>
    <AuthenticationMethod>none</AuthenticationMethod>
</HTTPProvider>
<HTTPProvider>
    <BaseClass>com.wowza.wms.plugin.loadbalancer.http.LoadBalancerInterface</BaseClass>
    <RequestFilters>*loadbalancerInterface</RequestFilters>
    <AuthenticationMethod>none</AuthenticationMethod>
</HTTPProvider>
Note: See the Wowza Dynamic Load Balancing AddOn User's Guide for details about these HTTP providers and for an example that shows the VHost.xml configuration for the Load Balancer. - Restart Wowza Streaming Engine:
/etc/init.d/WowzaStreamingEngine restart/
- Close the SSH Terminal window.
View Load Balancer statistics
A statistics interface lets you see connected edge servers and the bandwidth and countries allocated for them. It also allows you to shut down edge servers, removing them from the configuration while leaving other connected edge servers unaffected.
To configure this interface, repeat the task to Add the HTTP providers to the load balancer server instance to add the following LoadBalancerInfo HTTP provider to the load balancer server instance, making sure to add it above the HTTP provider that has the <RequestFilters>*</RequestFilters> property:
<HTTPProvider>
    <BaseClass>com.wowza.wms.plugin.loadbalancer.http.LoadBalancerInformation</BaseClass>
    <RequestFilters>*loadbalancerInfo</RequestFilters>
    <AuthenticationMethod>admin-digest</AuthenticationMethod>
</HTTPProvider>
After the provider is added, you can view the connected servers and their status in a web browser with the URL:
http://[load-balancer-ip-address]:1935/loadbalancerInfo
There's a Remove Client button for each server that you can remove from the configuration. Removing a server takes about a minute. The status page displays STOP in the statistics information panel until it's completely removed.

Redirection
The load-balancing redirection interfaces on the load balancer edge server let you provide a single URL to clients using the basic form:
[protocol]://[load-balancer-ip-address]:1935/redirect/[application-name]/[stream-name]?scheme=[http-transmission-scheme]
Where:
- [load-balancer-ip-address] is the IP address of the load balancer server instance, and
- the scheme URL query specifies the manifest file format in the redirect URL that's returned to clients. The scheme query is used only for HTTP redirection, not for RTMP or RTSP redirection.
A client is redirected to an available load-balancing server whose URL has the form:
[protocol]://[load-balanced-server-ip-address]:1935/[application-name]/[stream-name]?[manifest]
Depending on system load, the [load-balanced-server-ip-address] is either the load balancer server itself or one of the other load-balancing edge servers that you configured.
Note: When the loadbalanceType property is set to Server,Client on the load balancer server, it's also a load-balancing server that can fulfill the client request if it isn't overloaded. Setting this property value to Server means that the load balancer will redirect all client requests to connected load-balancing edge servers.
Wowza Streaming Engine load-balancing configurations support redirection over HTTP, RTMP, and RTSP.
HTTP redirection
The HTTP redirection interface lets you provide a single URL that redirects clients to an available load-balancing server without any additional configuration.
Note: HTTP clients are redirected using the HTTP 302 response status code. Your client must support the HTTP 302 code for load balancing to work. RTMP clients that use HTTP requests must support the returned XML.
HLS redirection URL
http://[load-balancer-ip-address]:1935/redirect/[application-name]/[stream-name]?scheme=m3u8
sends Apple HLS clients to:http://[load-balanced-server-ip-address]:1935/[application-name]/[stream-name]/playlist.m3u8
RTMP redirection URL
Note: Not all RTMP clients support XML redirection over HTTP.
http://[load-balancer-ip-address]:1935/redirect/[/url][application-name]/[stream-name]/loadbalancer.smil
returns XML similar to the following to RTMP clients using HTTP requests:
<xml version="1.0"?>
<smil>
    <head>
        <meta base="[load-balanced-server-ip-address]:1935/[application-name]/" />"
    </head>
    <body>
        <video src="[stream-name]" />
    </body>
</smil>
RTMP and RTSP redirection
Note: Not all RTMP clients support redirection via the RTMP protocol.
RTMP and RTSP redirection requires the addition of an application and and a redirection module to the load balancer server instance.
The redirection module returns an RTMP or RTSP redirect to clients that connect to the Load Balancer server, except for those that are configured to be ignored in the loadbalanceIgnoreClients property in the Server.xml file. Wowza edge servers that connect to a load balancer that's also an origin server in a live stream repeater (origin/edge) configuration are also ignored.
RTMP redirection URL
rtmp://[load-balancer-ip-address]:1935/redirect/[application-name]/[stream-name]
sends RTMP clients to
rtmp://[load-balanced-server-ip-address]:1935/[application-name]/[stream-name]
RTSP redirection URL
rtsp://[load-balancer-ip-address]:1935/redirect/[application-name]/[stream-name]
sends RTSP clients to:
rtsp://[load-balanced-server-ip-address]:1935/[application-name]/[stream-name]
Add RTMP and RTSP redirection functionality to the load balancer edge server
First, create a new Live application for redirection on the load balancer edge server.
- In Wowza Streaming Engine Manager on the load balancer edge server, click the Applications tab and then click Add Application in the contents panel.
- On the Add Application page, click the Live button to select that application type.
- In the New Application box, name the application redirect and then click Add.
Then, add the following redirect module to the redirect application.
- On the details page for the redirect application, click the Modules tab.
Notes:
- Access to the Modules tab requires an administrator user with advanced permissions. Enable access to advanced administrative settings.
- Be sure to add the module after the last module in the Modules list.
- Click Edit and then click the Add Module button.
- In the Add New Module dialog box, complete the required fields:
- Name – Enter Redirect.
- Description – Provide additional, useful information about the module. Not used in any operations.
- Fully Qualified Class Name – Enter com.wowza.wms.plugin.loadbalancer.redirect.ClientConnections.
- Name – Enter Redirect.
- Click Add.
- Click Save, and then restart the application.
- In the Google Cloud Platform Console, click the navigation menu icon in the upper-left corner of the page, scroll to Compute Engine, and the click VM instances.
- Select the load balancer edge server instance.
- At the top of the selected instance page, click SSH.
- In a text editor, edit the [install-dir]/conf/redirect/Application.xml file, and add the following module. Make sure to add it after the last module in the <Modules> list:
<Module> <Name>Redirect</Name> <Description>Redirect</Description> <Class>com.wowza.wms.plugin.loadbalancer.redirect.ClientConnections</Class> </Module> - Restart Wowza Streaming Engine:
/etc/init.d/WowzaStreamingEngine restart
- Close the SSH Terminal window.


