
When you broadcast an HLS stream using the Wowza Video™ service, you have control over whether the source encoder must use user authentication to publish an RTMP or RSTP stream. User authentication provides a secure connection from the source encoder into the ingest origin server for Wowza Video and prevents third parties from connecting to and altering your source stream.
This article shows you how to use Wowza Video to create a live stream with user authentication for RTMP or RTSP streams that are delivered to Wowza Video with a push connection or a pull connection. It also provides information on configuring a source encoder so that it can be authenticated for connection and suggests ways to secure HLS streams during playback.
To learn about other live stream or transcoder settings you might see in the user interface, see Live Stream Setup page in Wowza Video or Transcoder Setup page in Wowza Video.
You'll need to choose which workflow you'll use, live stream or transcoder, before you begin this task. See Decide between a live stream or transcoder workflow for more information about these workflows.
Live Stream Workflow
1. Create a live stream with user authentication
In the live stream workflow, we'll automatically configure the transcoder, output renditions, and stream targets to get you started quickly. This is the preferred workflow for most of our customers.
- Click Add Live Stream.
- On the Live Stream Setup page, provide basic information about your stream and then click Next.
- On the Video Source and Transcoder Settings page, provide information about the source encoder or camera that you're using and how it will connect to Wowza Video. Refer to Push stream or Pull stream for next steps depending on your setup.
Push stream
A push stream indicates that your video source will push the stream to Wowza Video.
a. Select one of these camera or encoder options that have source security enabled by default:
- Wowza GoCoder
- XSplit
- Other RTMP (Push Stream)
- Other RTSP (Push Stream)
b. With source security enabled, Wowza Video secures the connection from the source encoder or camera by requiring a source username and password for authentication. Wowza Video generates source username and source password values for you when you create the live stream.
Note: Select Disable authentication if you don't want to use authentication with your video source connection to a push stream.
Pull stream
A pull stream indicates Wowza Video pulls your stream from the encoder or IP camera.
a. Select one of these camera or encoder options to configure user authentication for a RTMP or RTSP pull stream:
- Axis
- Sony
- IP Camera
- Other RTMP (Pull Stream)
- Other RTSP (Pull Stream)
b. Under What is the source URL of your camera or encoder?, enter a source URL value that includes authentication information for the source encoder or IP camera, such as username and password.
Refer to documentation for your encoder or camera for information on the syntax of the source URL and available methods of source authentication. Authentication information included in the source URL can only contain alphanumeric, period (.), underscore (_), and hyphen (-) characters. The source URL for your camera or encoder must include a publicly accessible hostname or IP address.
Note: If you don't want to use authentication with your video source connection to a pull stream, enter a source URL without authentication information and disable authentication on your source encoder or camera.
- When you have completed selecting and entering configuration information on the Video Source and Transcoder Settings page, click Next.
- On the Playback Settings page, configure the player that you want to use and whether you want Wowza to generate a hosted webpage for your live stream, and then click Next.
- On the Hosted Page Settings page, configure the hosted webpage for your live stream, if you specified Yes in the previous step, and then click Next.
- Review your choices. If necessary, click Back or click the Live Stream Setup, Video Source and Transcoder Settings, Playback Settings, or Hosted Page Settings icon to edit your selections.
- Click Finish.
Wowza Video creates the live stream and displays the Overview tab of the live stream detail page.
- (Optional for a push stream) To enter your own values for source username and source password instead of using the values generated by Wowza Video, do the following:
- Click Edit on the Video Source and Transcoder tab of the live stream detail page.
- Under Source Security, click Change source username and password, and enter new values. Source Username and Source Password values are case-sensitive and can only contain alphanumeric, period (.), underscore (_), and hyphen (-) characters.
2. Configure a source
- Make sure you have the latest firmware for your encoder installed or have upgraded to the latest software updates. See the encoder's user guide for details about how to update firmware as well as how to operate the encoder and how to specify settings such as resolution, bitrate, and frame rate.
- Do one of the following, depending on your stream type:
- See the Source Connection Information on the Overview tab of the live stream detail page for server, port, and other details your encoder may need to connect to Wowza Video.
- Primary Server is the ingest location of the server.
- Host Port is the port (by default 1935)
- Stream Name or Stream Key is the stream name value assigned by Wowza Video
- Use the Source Username and Source Password in the Source Connection Information to authenticate your encoder.
- See the Source Connection Information on the Overview tab of the live stream detail page for server, port, and other details your encoder may need to connect to Wowza Video.
If you use an RTMP or RTSP pull connection, such as an IP camera, you configure the source by determining and providing the source URL value when creating the live stream.
3. Test the connection
- In Wowza Video, select the live stream.
- Click Start Live Stream at the top of the live stream detail page.
- Click Start to confirm that you want to start the stream.
Wowza Video opens the stream and connects with the encoder.
- Start the encoder.
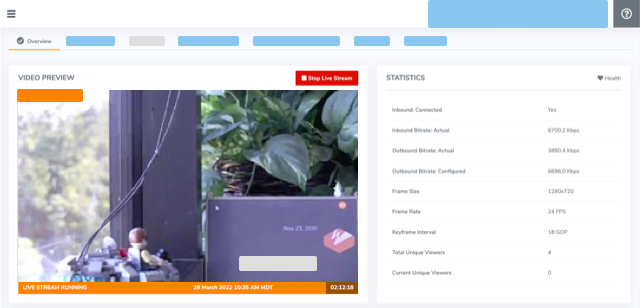
- In the Wowza Video web manager, confirm that the live stream is playing by looking at the Video Preview in the Overview tab of the Live Stream Details page.
The video preview displays a frame from the live stream every 5 seconds. The started date and time appear under the preview. Source stream, transcoder, and delivery metrics begin to update.

- Click Stop Live Stream at the top of the live stream detail page to end your test stream, and then stop the encoder.
Note: If you configure a camera or encoder to push video to the Wowza Video service, it may take up to 10 seconds once the live stream or transcoder has started for the encoder to connect. This is due to DNS lookup of the host server's IP address. For a more immediate connection, in the encoder settings, use the IP address that's visible in Wowza Video after the live stream or transcoder has started. See Speed up the connection to a transcoder in Wowza Video for more information.
Configure secure playback
To increase security on the playback side, see these articles:
- Manage HLS playback over SSL for Wowza CDN on Fastly in Wowza Video
- Geo-block Wowza CDN on Fastly stream targets in Wowza Video
- Protect a Wowza CDN on Fastly stream target with token authorization in Wowza Video
Transcoder workflow
1. Create a transcoder with user authentication
In the transcoder workflow, you'll manually configure the transcoder, output renditions, and stream targets to fit your specific streaming solution.
Note: The Transcoder Type and Billing Mode can't be changed after the transcoder is created.
- Sign in to Wowza Video.
- Under Advanced on the left navigation bar, click Transcoders, and then click Add Transcoder.
- On the Transcoder Setup page, enter a descriptive Transcoder Name.
- For Transcoder Type, choose Adaptive bitrate. Alternatively, select Passthrough to send the source video directly to the hosted page or other target without performing transcoding.
- For Closed Captions, choose None, CEA-608, onTextData, or CEA-608 and onTextData.
- For Source Protocol, select, provide information about the source encoder or camera that you're using and how it will connect to Wowza Video. Refer to Push stream or Pull stream below to determine which protocol and delivery source is best for you.
Push stream
A push stream indicates that your video source will push the stream to Wowza Video.
a. Select one of these camera or encoder options that have source security enabled by default:
- RTMP (Push Stream)
- RTSP (Push Stream)
With source security enabled, Wowza Video secures the connection from the source encoder or camera by requiring a source username and password for authentication. Wowza Video generates source username and source password values for you when you create the live stream.
Note: Select Disable authentication if you don't want to use authentication with your video source connection to a push stream.
Pull stream
A pull stream indicates Wowza Video pulls your stream from the encoder or IP camera.
a. Select one of these camera or encoder options to configure user authentication for a RTMP or RTSP pull stream:
- Other RTMP (Pull Stream)
- Other RTSP (Pull Stream)
b. Under What is the source URL?, enter a source URL value that includes authentication information for the source encoder or IP camera, such as username and password.
Refer to documentation for your encoder or camera for information on the syntax of the source URL and available methods of source authentication. Authentication information included in the source URL can only contain alphanumeric, period (.), underscore (_), and hyphen (-) characters. The source URL for your camera or encoder must include a publicly accessible hostname or IP address.
If you use an RTMP or RTSP pull connection, such as an IP camera, you configure the source by determining and providing the source URL value when creating the live stream.
- Specify other transcoder setup options.
- Click Add.
Wowza Video creates the transcoder and displays the Outputs & Targets tab of the transcoder detail page. - Complete the transcoder by adding output renditions and stream targets. For instructions, see one of the following articles, depending on whether you're creating an adaptive bitrate or passthrough transcoder:
2. Configure a source
Make sure you have the latest firmware for your encoder installed or have upgraded to the latest software updates. See the encoder's user guide for details about how to update firmware as well as how to operate the encoder and how to specify settings such as resolution, bitrate, and frame rate.
Do one of the following, depending on your stream type:
- See the Source Connection Information on the Overview tab of the live stream detail page for server, port, and other details your encoder may need to connect to Wowza Video.
- Primary Server is the ingest location of the server.
- Host Port is the port (by default 1935)
- Stream Name or Stream Key is the stream name value assigned by Wowza Video
- Use the Source Username and Source Password in the Source Connection Information to authenticate your encoder.
Tip: This topic uses the push delivery method. If you use an RTMP or RTSP pull connection, such as an IP camera, you configure the source by determining and providing the source URL value when creating the live stream.
3. Test the transcoder connection
- In Wowza Video, select the transcoder.
- Click Start Transcoder at the top of the transcoder detail page.
- Click Start to confirm that you want to start the stream.
- Start the encoder.
- In the Wowza Video web manager, confirm that the live stream is playing by looking at the Video Preview in the Overview tab of the Transcoder Details page.
The video preview displays a frame from the live stream every 5 seconds. The started date and time appear under the preview. Source stream, transcoder, and delivery metrics begin to update.


- Click Stop Transcoder at the top of the transcoder detail page to end your test stream, and then stop the encoder.
Note: If you configure a camera or encoder to push video to the Wowza Video service, it may take up to 10 seconds once the live stream or transcoder has started for the encoder to connect. This is due to DNS lookup of the host server's IP address. For a more immediate connection, in the encoder settings, use the IP address that's visible in Wowza Video after the live stream or transcoder has started. See Speed up the connection to a transcoder in Wowza Video for more information.
Configure secure playback
To increase security on the playback side, see these articles:


