
Within a matter of minutes, you can set up and play your first stream on a customizable webpage hosted by Wowza Video™.
Wowza Video lets you easily stream live video to any device, scaling automatically to accommodate audiences of any size, anywhere. Wowza Video accepts video from nearly any encoder or IP camera, transcodes that video in the cloud, and delivers a high-quality stream in multiple bitrates that can be watched in a customizable player on virtually any device.
This tutorial walks you through using Wowza Video to deliver a stream from a video source to a player on a hosted page. You'll use a camera to capture a video stream that's pushed to the Wowza Video service for processing, and then the highest quality stream for each viewer's bandwidth is delivered to the player. Wowza Video handles the entire streaming and viewing experience.
Before you start
You should have access to the following items:
- A Wowza Video account or a free trial account.
- A video source (camera or encoder). This tutorial uses OBS Studio as an encoder to send an RTMP stream to Wowza Video. For more information about OBS Studio and to download the application, visit the OBS website.
1. Sign in to Wowza Video
You can sign in to Wowza Video using any modern web browser that supports HTML5 and Cascading Style Sheets level 3 (CSS 3). The Wowza Video user interface has been most extensively tested on Google Chrome, however, so for best results we recommend that you use the latest version of Google Chrome.
- Access Wowza Video by navigating to app.wowza.com.
- Sign in using your Wowza credentials and accept the Terms of Use if prompted.
2. Set up your stream
The quickest way to your first broadcast is with our Go live now option. We'll create a stream and viewing experience capable of reaching your global audience. All you have to do is connect your camera and share a viewing URL with your audience!
- In Wowza Video, navigate to the Live streams page and click Add new.
- From the Type list, select Go live now.
- Enter a title for your stream.
You'll want it to describe the purpose of your streaming event, so it's easy to differentiate in your list of live streams. - Select the region closest to your broadcast location to get the best stream performance.
Selecting the closest location minimizes network distance and reduces latency. - From Stream input type, select RTMP and make sure the default Push is selected.
- Leave the Stream profile field as the default of 1080p (HD).
Selecting the input resolution matters when you stream high-definition video and want the highest resolution available in the adaptive bitrate (ABR) ladder Wowza Video creates. - (Optional) Select Record this stream if you want a recording of your live event. Wowza Video will save an MP4 and video-on-demand asset in the Videos section for future use.
- Select Create live stream.
Wowza Video creates the live stream and displays the Overview tab of the live stream details page.
Tip: After you create the live stream, it shows up in your Live streams list. If you click on the name of the live stream, the live stream details page opens where you can edit the settings you chose when you set up your stream or change any of the settings we defaulted for you.
3. Set up your viewing experience
Wowza Video generates several viewing formats for your stream, giving you flexibility in presentation. You can use one viewing format or combine them for a more robust viewing experience. For this tutorial, we'll use the hosted page, an HTML page that we generate and host for you, to view the stream.
- After the stream is created, make sure you're on the live stream details page and click Share live stream to display the viewing formats we provide.

- Select the Hosted page tab.
While you could change the Player configuration so the player is specifically branded for your event, we'll keep the default configuration for this tutorial. - Click the Open link button to open a browser tab with the hosted page. On the hosted page, you'll see your live stream title and a player that's embedded in the HTML. The player is already configured to use your live stream as the video source.

More resources:
- See Live stream details page in Wowza Video to learn more about the other viewing options, including ways to embed our player into your own site.
- See Create a player configuration in Wowza Video to learn more about branding your player for your event.
4. Connect your encoder or camera to the stream
When you create a live stream, Wowza Video generates some information that you use to send a video source to the live stream for processing. In this example, we're using OBS Studio.
- In Wowza Video, on the Overview tab for your live stream, locate the Connection section.
You use the information in this section to configure OBS Studio in the following steps.
- Open OBS Studio.
- Click Settings.
- On the Stream tab, for Service, select Custom.
- Enter the Primary Server for your live stream in the Server field.
- Enter the Stream Name for your live stream in the Stream Key field.
- Select Use authentication and enter the Username and Password for your live stream.
- Click OK.
Note: For more information about configuring OBS Studio, see the OBS Studio documentation.
Now that you've configured your video source, you'll start the live stream in Wowza Video first so it's ready to process the incoming video, then you'll start the stream in OBS Studio.
5. Start your stream
Once your encoder is able to connect to Wowza Video, you can start your live stream.
- Click Start live stream.
- Click Start to confirm that you want to start the stream.
Wowza Video opens the stream and connects with the encoder. - When Wowza Video shows the stream status as Running, start the stream in OBS.
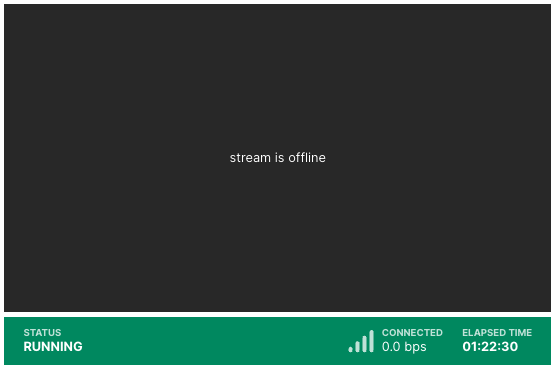
- In Wowza Video, confirm that the live stream is playing by looking at the video preview on the Live Stream Details page.

6. Test your stream playback
On the browser window you opened in step 3 with the hosted page, verify you see the stream playback.
If you sent the hosted page URL to your viewers, you're seeing their viewing experience.
7. Stop your stream
When you're done streaming, in Wowza Video, click Stop live stream at the top of the live stream page. Then stop the stream in OBS Studio.
Important: Charges accrue for live streams started in Wowza Video even if they aren't actively streaming content. Wowza Video automatically stops idle live streams after 20 minutes, but you should stop your stream as soon as your event ends to avoid accruing unnecessary charges.


