
XSplit Broadcaster is an audio/video mixing application that lets you create professional-quality live broadcasts from multiple H.264 encoding sources. You can also send XSplit live streams to the Wowza Video™ service. Just choose XSplit as your video source, and Wowza Video generates a connection code that you can use to send streams from XSplit Broadcaster to Wowza Video.
To learn about other live stream settings you might see in the user interface, see Live Stream Setup page in Wowza Video.
Note: XSplit Broadcaster 2.5 or later and the Wowza Video Broadcast Plugin are required.
1. Create a live stream that uses XSplit as the video source
If you haven't already done so, create a live stream in Wowza Video that uses XSplit Broadcaster as the video source.
- Sign in to Wowza Video.
- Click Add Live Stream.
- On the Live Stream Setup page, enter a Live Stream Name, choose a Broadcast Location, and then click Next.
- On the Video Source and Transcoder Settings page, select XSplit as the encoder you want to use to connect to Wowza Video.
- Specify other video source settings, click Next, and complete the steps to finish creating the live stream.
Wowza Video creates the live stream and displays the Overview tab of the live stream detail page.
2. Connect XSplit Broadcaster to Wowza Video
After you've added a live stream in Wowza Video, configure XSplit Broadcaster to connect to Wowza Video.
- In the Wowza Video user interface, select the live stream that uses the XSplit Broadcaster as its video source.
- On the Overview tab of the live stream detail page, make note of the six-digit Connection Code.
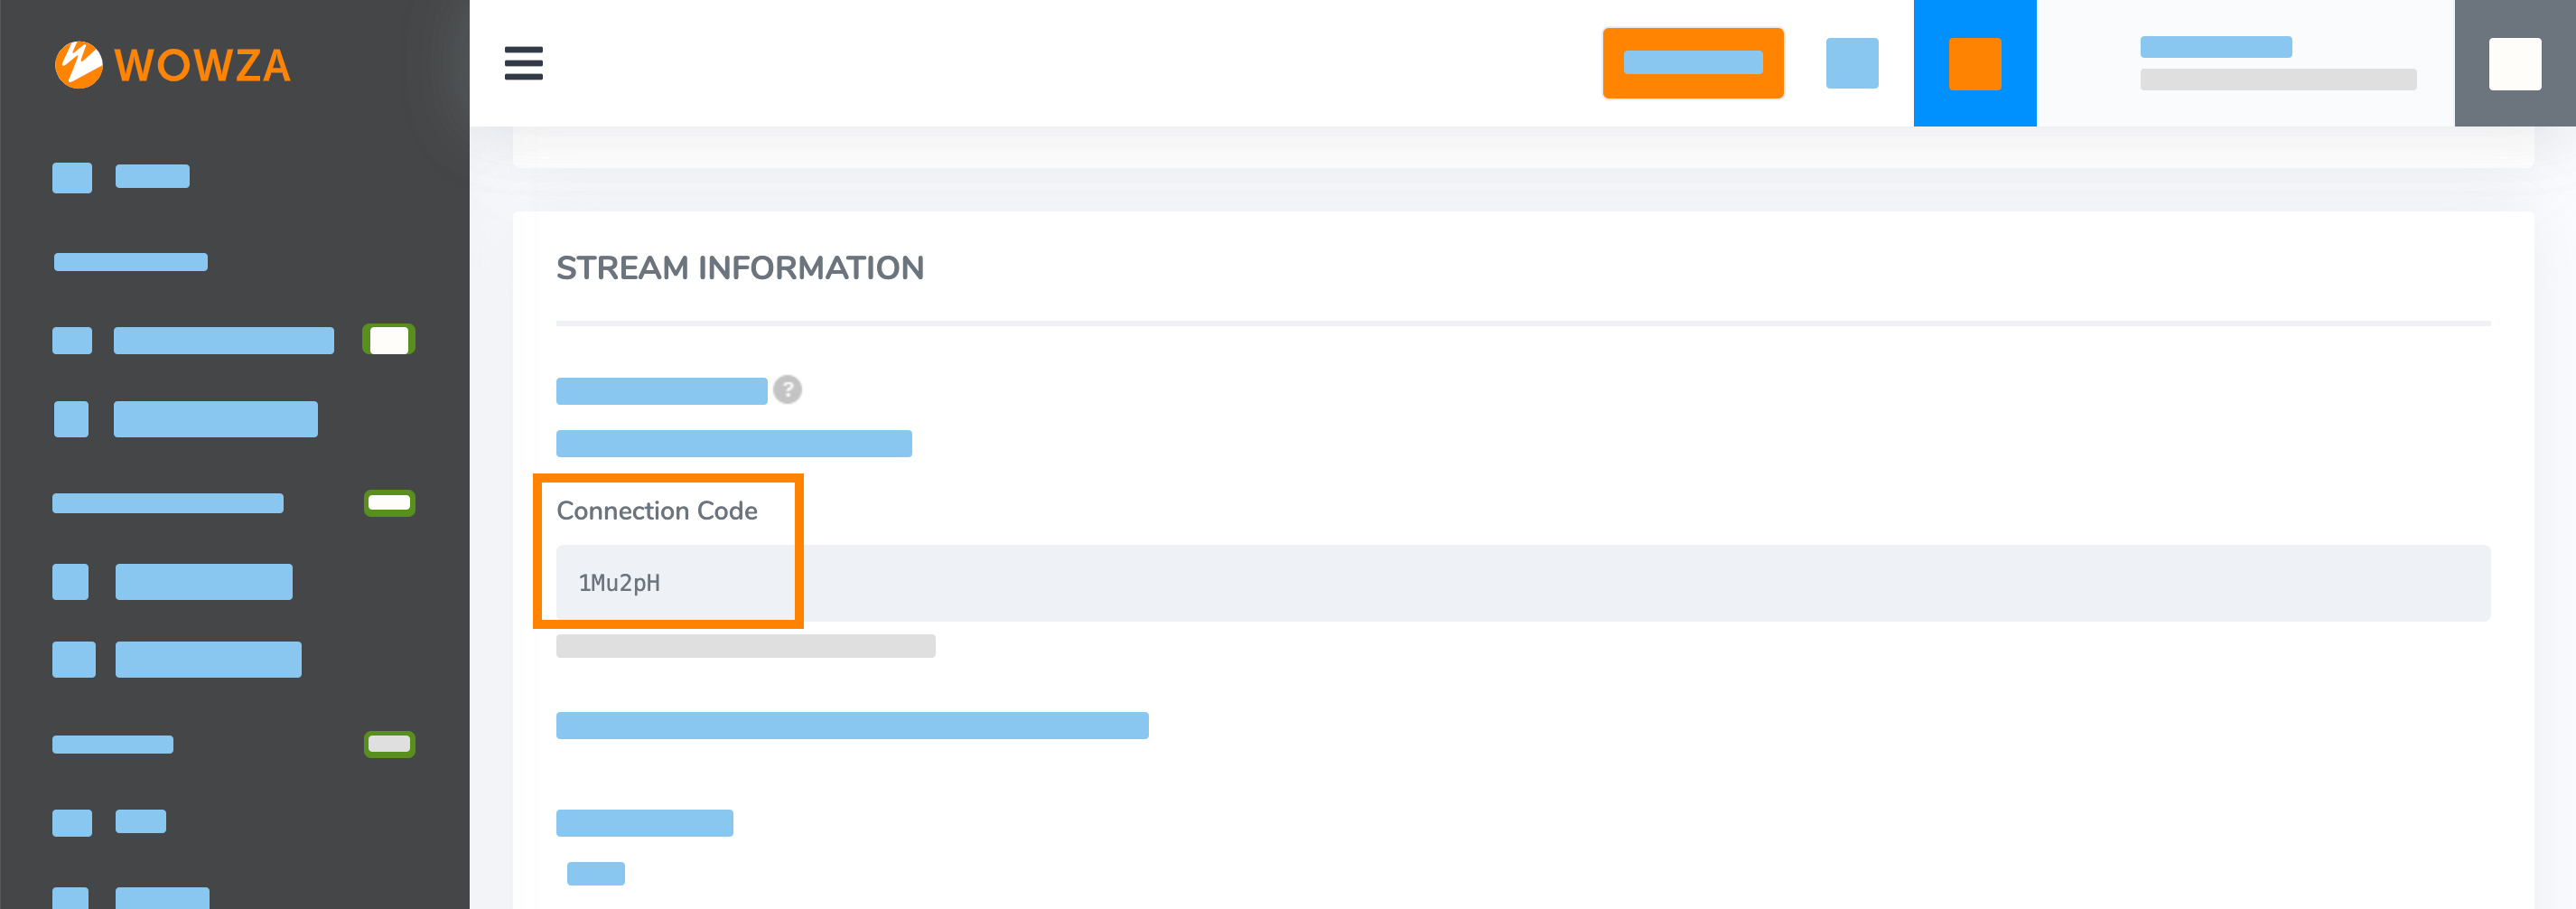
Note: Connection codes can be used once and expire after 24 hours. If you need a new code, click Regenerate Connection Code.
- In XSplit Broadcaster, click the Broadcast menu, choose Set up a new output, and select Wowza Video.
- If Wowza Video isn't listed, choose Find more outputs, and select and install the Wowza Video plugin.
- In the Live Stream area of the Wowza Video Properties dialog box, click Authorize.
- Enter the six-digit Connection Code from Wowza Video and then click Authorize.
- Configure any other settings for your stream in the Wowza Video Properties dialog box in XSplit Broadcaster, and then click OK.

3. Test the connection
- In Wowza Video, select the live stream that uses the XSplit Broadcaster as its video source.
- Click Start Live Stream at the top of the live stream detail page, and then click Start to confirm that you want to start the stream.
- In XSplit Broadcaster, click the Broadcast menu and select Wowza - [live stream name] to start the connection.
Wowza Video and the XSplit Broadcaster connect and the stream starts running.
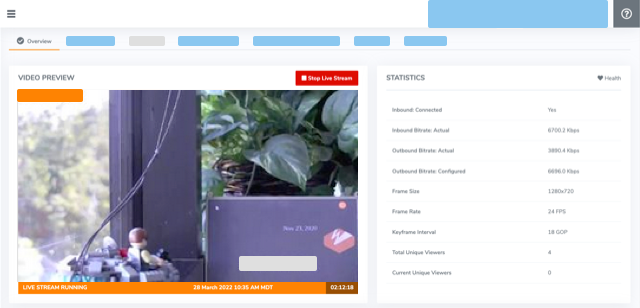
- In the Wowza Video web manager, confirm that the live stream is playing by looking at the Video Preview in the Overview tab of the Live Stream Details page.
The video preview displays a frame from the live stream every 5 seconds. The started date and time appear under the preview. Source stream, transcoder, and delivery metrics begin to update.
In XSplit Broadcaster, information about the running stream appears above the menu bar.

- Click Stop Live Stream at the top of the live stream detail page to end your test stream, and then stop the stream in XSplit Broadcaster.
Note: If you configure a camera or encoder to push video to the Wowza Video service, it may take up to 10 seconds once the live stream or transcoder has started for the encoder to connect. This is due to DNS lookup of the host server's IP address. For a more immediate connection, in the encoder settings, use the IP address that's visible in Wowza Video after the live stream or transcoder has started. See Speed up the connection to a transcoder in Wowza Video for more information.


