The Wowza Video™ service can create MP4 recordings of your streams, which you can download and save locally. By default, they are based on the incoming source stream, but you can configure a transcoder to record a specific output rendition.
Note: Your options to record streams will appear slightly different depending on whether you are a Wowza Video subscriber or using Wowza Streaming Cloud. The differences are noted in the steps below.
Recordings created from the live stream or transcoder workflow capture up to eight hours of content. If a live stream or transcoder runs for longer than eight hours, the most recent eight hours are recorded. To record more than eight hours of a single broadcast, stop the live stream or transcoder and start it again to create multiple recordings. Recordings created from the Real-Time Streaming at Scale workflow capture up to twelve hours of content in a single MP4 file. If the real-time stream recording is longer twelve hours, you'll have multiple files for the recording.
Recorded content stored in Wowza Video incurs additional costs. Billing is based on your peak storage, which you can view and monitor in the Wowza Video user interface.
To learn about other live stream or transcoder settings you might see in the user interface, see Live Stream Setup page in Wowza Video or Transcoder Setup page in Wowza Video.
Note: Audio and video must be transcoded when recording a WebRTC source stream. For more information, see Connect a WebRTC stream to Wowza Video.
Live Stream Workflow
1. Create a live stream
In the live stream workflow, we'll automatically configure the transcoder, output renditions, and stream targets to get you started quickly. This is the preferred workflow for most of our customers.
Note: 24x7 streams and transcoders can't be recorded.
- Click Add Live Stream.
- On the Live Stream Setup page, give your stream a name, specify your broadcast location, and then click Next.
- On the Video Source and Transcoder Settings page, choose the camera or encoder you're using as your video source and the aspect ratio and resolution of the source video you're sending to Wowza Video. If your subscription allows, also choose a Billing Mode and Live Stream Type.
- If you are a Wowza Video subscriber, select Save to Asset Management. By default, both an MP4 file and an HLS stream for video-on-demand (VOD) replay are created. VOD streams can take a bit of processing time as multiple renditions are created. If you only need the MP4, you can save processing time by selecting Disable VOD encoding and save only as an MP4.
- Wowza Streaming Cloud subscribers should select Record the live stream and create an .mp4 file for download.
- Wowza Streaming Cloud subscribers should select Record the live stream and create an .mp4 file for download.
- Complete the steps to create the live stream: Specify Playback Settings and Hosted Page Settings, and then review your choices and click Finish.
2. Start recording
When you start the live stream, Wowza Video begins the recording. When you stop the live stream, recording stops.
- On the live stream detail page, click Start Live Stream.
- To end the stream and the recording, click Stop Live Stream.
Note: We recommend leaving the live stream running for 10 to 15 seconds after the end of the event. This ensures that the recording doesn't cut off prematurely.
3. Play or save a recording
- Click Manage Assets under Asset Management in the left navigation bar.
- Wowza Streaming Cloud subscribers can view their recordings under Recordings in the Advanced section of the left navigation bar.
- Search for your live stream.
- Click Download.
Transcoder Workflow
1. Create a transcoder
In the transcoder workflow, you'll manually configure the transcoder, output renditions, and stream targets to fit your specific streaming solution.
Note: 24x7 streams and transcoders can't be recorded.
- Under Advanced on the left navigation bar, click Transcoders, and then click Add Transcoder.
- On the Transcoder Setup page, enter a descriptive Transcoder Name. If your subscription allows, also choose a Billing Mode and specify your broadcast location closest to you.
- If you are a Wowza Video subscriber, select Save to Asset Management.

- Wowza Streaming Cloud subscribers should select Record the transcoder and create an .mp4 for download.
- Complete the steps to create the transcoder and then click Add.

2. Start recording
When you start the transcoder, Wowza Video begins the recording. When you stop the live stream or transcoder, recording stops.
- On the Transcoder Details page, click Start Transcoder.
- To end the stream and the recording, click Stop Transcoder.
Note: We recommend leaving the transcoder running for 10 to 15 seconds after the end of the event. This ensures that the recording doesn't cut off prematurely.
3. Play or save a recording
- Wowza Video subscribers can access the recording by clicking Manage Assets under Asset Management in the left navigation bar.
- Wowza Streaming Cloud subscribers can view their recordings under Recordings in the Advanced section of the left navigation bar.
- Search for your live stream.
- Click Download.
Real-Time Streaming at Scale Workflow
With Wowza Video, you can ingest and deliver real-time streams with all major desktop and mobile browsers that support WebRTC APIs. To get the most value from your live content, you can record a stream and re-play or share it later.
Note: To enable and purchase capacity for Real-Time Streaming at Scale for your account and access the /webrtc operations, contact 720.279.8163 or schedule a call.
1. Create a real-time stream
- Under Advanced on the left navigation bar, click Real-Time Streams, and then click Add Real-Time Stream.
- On the setup page, complete the form, make sure to:
- Select Save to Asset Management to record the stream, if you're a Wowza Video subscriber.
- By default, both an MP4 file and an HLS stream for video-on-demand (VOD) replay are created. VOD streams can take a bit of processing time as multiple renditions are created. If you only need the MP4, you can save processing time by selecting Skip VOD encoding and save only as an MP4.
- Select Record the real-time stream and create an .mp4 file for download if you're a Wowza Streaming Cloud subscriber.
- Select Save to Asset Management to record the stream, if you're a Wowza Video subscriber.
- Click Add.
2. Start recording
When you start the real-time stream, recording begins. When you stop the stream, recording stops.
3. Play or save a recording
- Wowza Video subscribers can access the recording by clicking Manage Assets under Asset Management in the left navigation bar.
- Wowza Streaming Cloud subscribers can view their recordings under Recordings in the Advanced section of the left navigation bar.
- Search for your real-time stream.
- You can:
- Click Download to save the recording locally or share it offline.
- Click the asset and then select Re-stream Asset to create a new live stream you can stream immediately or schedule for a future date.
Asset Management
Wowza Video introduces several additional services, such as asset management, which are only available to customers who have purchased a Wowza Video subscription. Contact our sales team or visit our website to learn more.
You can restream and edit your assets from this page. See Asset Details page for more information.
You can stream a downloaded MP4 recording in Wowza Video, or use a third-party platform, such as Instagram’s IGTV. For IGTV requirements such as aspect ratio, frame rate, file size, and recording length, see Uploading Videos to IGTV in the Instagram Help Center. To learn more about file streaming, see Stream a file in Wowza Video.
Check Recording Usage
Billing for recordings is based on your peak storage, which is the greatest amount of recorded content (recordings and VOD streams) stored in a given month. Say, for example, you record three events and midway through the billing cycle, all three recordings, totaling 30 GB, are in Wowza Video. Then you delete one of the recordings, leaving 20 GB in Wowza Video. Your peak storage for the month is 30 GB.
In Wowza Video, you can see your peak storage for any period of time, present or past.
- Click Advanced on the menu bar, and then click Recordings.
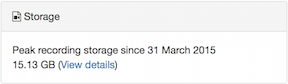
Peak storage for the current billing period appears in the Storage panel in the upper-left corner of the page. The amount shown isn't necessarily the amount you'll be billed, however, since peak storage isn't calculated until the billing period closes.
The total storage used for all recordings in your account (or in the filtered search results) at the current moment appears in the record summary above the recordings table.
If you've deleted recordings, the total will be lower than the peak storage amount that appears in the Storage panel.
To view peak storage for a different period of time, go to the Storage tab of the account usage page:
- In the Storage panel of the account Recordings page, click details.
- On the Storage tab of the account usage page, select or enter a new date/time range and then click Filter Data.
Note: You can also get your account's peak storage by clicking your user name on the menu bar and then choosing Usage. Then, click the Storage tab.


