Wowza Streaming Engine™ media server software is a powerful Java server. When you install Wowza Streaming Engine 4.2.0 and later, the software automatically installs the required server version of Java that it needs, making it easy to get up and running. For details, see Wowza Streaming Engine support for Java.
For optimal performance and stability, we recommend using the Java version that installs by default with Wowza Streaming Engine. However, if you can't or don't want to use the version of Java that installs with Wowza Streaming Engine, you can manually install and use a different version of Java.
About Wowza Streaming Engine and Java
When you install Wowza Streaming Engine 4.2.0 or later, Wowza Streaming Engine installs the server version of Java it requires. For more details, see Wowza Streaming Engine support for Java.
- Wowza Streaming Engine 4.9.0 and later is compiled using Java 17 (OpenJDK Java SE JRE 17.0.12), but new installations include a Java Runtime Environment (JRE) for Java 21 (OpenJDK Java SE JRE 21.0.3). When using the updater for Wowza Streaming Engine 4.9.0 and later, we verify that Java 21 is present. If it's not detected, the update is canceled, and you can install the JRE 21 provided with the updater before retrying the upgrade. You can manually roll back to Java 17 if needed, but older Java versions (16 and below) aren't supported with Wowza Streaming Engine 4.9.0 and later.
- Wowza Streaming Engine 4.8.28 is compiled using Java 11 (OpenJDK Java SE JRE 11.0.2), but new installations include Java 21 (OpenJDK Java SE JRE 21.0.3). You can manually roll back to Java 11 if needed. When using the Wowza Streaming Engine 4.8.28 updater, we respect the same JRE included with your original installation for Java 11 (OpenJDK Java SE JRE 11.0.2).
- Wowza Streaming Engine 4.8.18 - 4.8.27 is compiled using OpenJDK Java SE JRE 11.0.2 and requires Java 11 at a minimum but can be used with Java versions 11 - 12. If you prefer, you can manually install a different version of Java. We support Java versions 11 - 12.
- Wowza Streaming Engine versions 4.7.8 - 4.8.17 require OpenJDK Java SE JRE 9.0.4 at a minimum but support up to Java version 12. Previous versions of Wowza Streaming Engine (version 4.7.7 and earlier) required Java 8.
For optimal performance and to use Transcoder, you must deploy Wowza Streaming Engine on a 64-bit operating system with a 64-bit version of Java.
Determine which version of Java your Wowza Streaming Engine instance is using
- In Wowza Streaming Engine Manager, click Server in the menu bar.
- Click About in the contents panel.
- The About Wowza Streaming Engine page displays the Java Version, Java VM Version, Java Architecture, and other details about the Java version in use.

Download and install Java
If you want to use a different Java version than the one you have, follow these steps:
- Download the version of Java to use.
- OpenJDK Java SE JRE 21.0.3 – You can use this OpenJDK Java SE JRE version 21.0.3 package. If using this Java version to update your Java installation, you must unzip the package, select the folder that matches your operating system, and then copy and paste the contents into your Wowza Streaming Engine [install-dir]/jre directory.
- OpenJDK Java SE JRE 11.0.2 – You can use this OpenJDK Java SE JRE version 11.0.2 package. If using this Java version to update your Java installation, you must unzip the package, select the folder that matches your operating system, and then copy and paste the contents into your Wowza Streaming Engine [install-dir]/jre directory.
- Other Java versions – If you want to use a different version of Java, go to the OpenJDK Java Archive page and download a 64-bit version of Java 11, 12, 21, or Server JRE.
Note: The only time you should install a 32-bit version of Java is if you're running Wowza Streaming Engine on 32-bit Windows.
- Follow the instructions to install the Java environment.
- Confirm Wowza Streaming Engine is using the new version. See Determine which version of Java your Wowza Streaming Engine instance is using.
- If Wowza Streaming Engine isn't using the right version of Java, point it to the version you installed. See Instruct Wowza Streaming Engine to use a specific version of Java.
Instruct Wowza Streaming Engine to use a specific version of Java
The instructions in this section explain how to specify what version of Java Wowza Streaming Engine should use on Windows 10 and Linux.
Instruct Wowza Streaming Engine on Windows 10 to use a specific version of Java
On Windows, Wowza Streaming Engine 4.2.0 and later use the WMSJAVA_HOME environment variable to determine which Java environment to run.
If you have problems starting Wowza Streaming Engine on Windows, ensure that WMSJAVA_HOME points to the installed Java environment. If you change or upgrade your Java environment and the installation path changes, be sure to update WMSJAVA_HOME to point to the new location. The WMSJAVA_HOME environment variable should point to the base folder of the Java installation. The base folder is the folder that contains the bin folder.
- In the Control Panel, click System and Security.
- Select System and then click Advanced system settings in the left column.
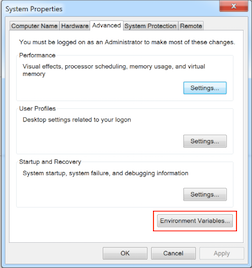
- On the Advanced tab of the System Properties window, click Environment Variables.
- In the Environment Variables window, in the System variables list, select WMSJAVA_HOME, and then click Edit.
- Change the Variable value to the path of the Java version you want to use.
Note: Paths should point to a 64-bit version of Java at C:\Program Files\Java. Paths to C:\Program Files (x86)\Java point to a 32-bit version of Java. - Save your changes.

Instruct Wowza Streaming Engine on Linux to use a specific version of Java
Update the Wowza Streaming Engine symbolic link (symlink) at /usr/local/WowzaStreamingEngine/java to point to the new version of Java. For example, if the new Java version is installed at /usr/lib/jvm/jdk11.0.2, execute the following commands:
rm -rf /usr/local/WowzaStreamingEngine/java ;
ln -sf /usr/lib/jvm/jdk11.0.2/ /usr/local/WowzaStreamingEngine/java
Troubleshooting
Get Java installation details and start Wowza Streaming Engine in console mode
If you run into problems when starting Wowza Streaming Engine, use the following commands to print the Java variables and start the software in console mode. The information you print may provide clues about the problem and provide context to help troubleshoot your installation, and the startup command will get Wowza Streaming Engine running.
Windows
Open a Command Prompt window and execute the following commands:
echo %WMSJAVA_HOME%
"%WMSJAVA_HOME%"\bin\java -version
echo %WMSAPP_HOME%
echo %WMSCONFIG_HOME%
cd %WMSAPP_HOME%/bin
startup.bat
Linux
Open a Terminal window and execute the following commands:
[install-dir]/WowzaStreamingEngine/java/bin/java -version
cat [install-dir]/WowzaMediaServer/bin/setenv.sh
cd [install-dir]/bin
sudo ./startup.sh
Instruct Wowza Streaming Engine to use the Java "en" locale
Wowza Streaming Engine may not start or may not run after starting when the Java environment points to certain locales, such as Turkish. To address this problem, instruct Wowza Streaming Engine to run under the "en" locale by editing the VMOption variable in the Tune.xml file.
- Open [install-dir]/conf/Tune.xml in a text editor and find the following line:
<!-- <VMOption>-Duser.language=en -Duser.country=US -Dfile.encoding=Cp1252</VMOption> -->
- Uncomment the line by removing the <!-- from the beginning of the line and the --> from the end of the line, as follows:
<VMOption>-Duser.language=en -Duser.country=US -Dfile.encoding=Cp1252</VMOption>
- Save your changes and restart Wowza Streaming Engine.
- Confirm that the settings have taken effect by opening the latest access log at [install-dir]/logs/wowzastreamingengine_access.log.YYYY-MM-DD and looking for following entries:
INFO server comment - Java Locale[user.language]: en
INFO server comment - Java Locale[user.country]: US
INFO server comment - Java Locale[user.variant]:
INFO server comment - Java Locale[file.encoding]: Cp1252
For further troubleshooting, post a question to the forum or open a Support ticket. (Technical support is included with all active subscriptions and maintenance and support contracts.) In the Support ticket form, be sure to share the Java variables you printed in your detailed problem description.


