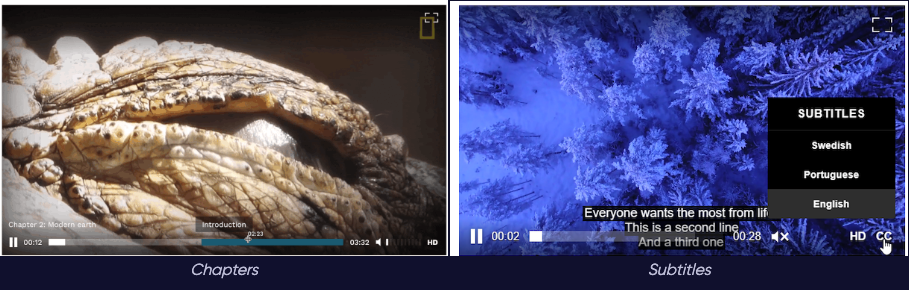
Wowza Video supports the display of chapters and multiple subtitles/captions in WebVTT format. Wowza Video embeds will automatically display the chapters to users and offer a subtitle option/menu as well once you’ve created them for a video.
Wowza Video enables users to insert ad positions within videos, allowing for precise control over when and where advertisements are displayed during video playback.
Chapters, subtitles, and ad positions editor overview
The chapters, subtitles, and ad positions (ad insertion points) for a video are managed using the Edit Chapters, subtitles, and ad positions editor. To access it, click Videos in the navigation, select a video in the Videos list, then click Edit chapters, subtitles, and ad positions in the Video Details page.
Learn more about the Video Details page to see the specific settings and their descriptions you can configure for adding chapters, subtitles, and ad to a video.
Tracks
When first opening the editor, you will see the video preview player and the chapters and ad insertion points tracks. If the video already has subtitle tracks, you will also see those below the chapters track.
The tracks are laid out on a horizontal timeline representing the duration of the video. The vertical orange line on the timeline is the cursor which represents the current position of the video preview playback. Clicking anywhere on the timeline will move the cursor to that position. If you want to move the timeline cursor to the start time of a chapter/text cue, double-click it.
Zoom
Since the timeline encompasses the entire duration of the video, you may need to zoom in on parts of the timeline for more precise control.
To zoom, you have three options:
- Use the zoom and focus controls located directly below the timeline.
- Use the bar that represents the currently visible part of the timeline.
- Hold down Alt on your keyboard and click anywhere on the timeline.
Zoom and focus controls
Using the zoom and focus controls, you can:
- Zoom in on the timeline.
- Zoom out on the timeline.
- Zoom and focus on the currently selected chapter/text cue.
- Zoom out completely to show the full timeline.
- Scroll the timeline to put the cursor in view.
Bar
Below the zoom and focus controls, there's a bar that represents the currently visible part of the timeline. Using the handles, you can resize the bar which zooms in and out on the corresponding part of the timeline. You can also drag the actual bar part to focus on a corresponding part of the timeline.
Alt
You can zoom in by holding the Alt key and clicking anywhere on the timeline. Holding the Alt and Shift keys while clicking on the timeline zooms out.
Note: You can customize aspects of the Edit Chapters, subtitles, and ad positions editor to your own preferences. Click on the gear icon in the upper right corner of the editor to access the Editor Preferences dropdown. These preferences are device/browser specific. The customization won't display on another device or browser.
Add chapters to a video
Note: If you already have a .vtt file with chapters, click the File Upload icon next to Chapters to load it. This will replace any existing chapters.
Chapters assign descriptive titles to parts of a video and display this information to users during video play. Chapters can help users determine if they want to jump to different points in a video based on the assigned titles they see at specified time points in the video.
To add chapters:
- Click Edit Chapters, subtitles, and ad positions on the Video Details page for a video you've selected from the Videos list.
- Do one of the following:
- Double-click on an empty portion of the Chapters track. This adds a new chapter at its corresponding position. Use this method only when you have an empty chapter track or before the first chapter. You can click and drag the left white line of the chapter on the track to move the start time of the chapter.
- Single click into an empty portion of the track to move the current orange cursor position on the Chapters track to the start time you want for your chapter. Then, click the + to the right of Chapters. This is the start of your next chapter.
- Input the chapter title in the Chapters form.
- To edit the start time, either click the Start Time field and edit it for the chapter or hover over the white vertical line (the current start time for the chapter) on the Chapter track and click and drag it with your mouse to where you want to start the chapter.
- Click Save.
- Click Remove Chapter to delete the chapter, if needed.
- Repeat steps 2 (second bullet) through 6 as needed.
Chapters are shown on the Chapter track as blue boxes and the white lines on the track are where each chapter starts. When a chapter is selected, its details are shown in the Chapters form.
Note: Unlike subtitle text cues, a chapter does not have an end point. Each chapter extends to the next chapter’s start time or, if it’s the last chapter, to the end of the video. The last chapter will always end at the end of the video, but the first chapter does not have to start at the start of the video.
Add ad insertion points to a video
Ad insertion points are predefined locations in a video where advertisements are placed during playback. These points allow for seamless ad integration without disrupting the viewing experience. Ads can be inserted at pre-roll (at the beginning of the video), mid-roll (during the video), or post-roll (at the end of the video), based on the content. This approach helps monetize the video by generating revenue from ad views.
Note: Ad insertion points must be combined with the client-side ad insertion method. For more information see, Client-side ad insertion and Create a VAST ad schedule in Wowza Video.
To add ad insertion points:
- Click Edit Chapters, subtitles, and ad positions on the Video Details page for a video you've selected from the Videos list.
- Click the + to the right of Ad insertion points.
- Input the description of the ad insertion point form.
- Do one of the following:
To add an ad insertion point for a pre-roll ad, enter the time in the time field as anything between 0:00.000 and 0:01.000 or drag the orange cursor to the very beginning of the video on the ad insertion points track.- To add an ad insertion point for a mid-roll ad, enter the time in the time field as anything between 0:01.000 and 0:29.000 (for a 30-second video) or drag the orange cursor to the position of the video where you want to place the ad on the ad insertion points track.
- To add an ad insertion point for a post-roll ad, enter the time in the time field, for example, as anything between 0:29.000 and 0:30.000 for a 30-second video or drag the orange cursor to the very end of the video on the ad insertion points track.
- Click Next ad insertion point to go to the next ad position and repeat step 4 above.
- Click Previous ad insertion point to go to a previously created ad position and edit as needed.
- Click Save.
- Click Remove ad insertion point to delete an ad position.
- Repeat steps 2 through 8 as needed.
Add subtitles to a video
Subtitles use cues to determine a span of time and the lines of subtitle text that will display to viewers. You can insert cues and the text for each cue through Wowza Video.
Note: You can also use the Subtitles header to import a subtitle track from an existing .vtt file.
To add subtitles:
- Click Edit Chapters, subtitles, and ad positions on the Video Details page for a video you've selected from the Videos list.
- Click the + to the right of Subtitles.
- In the subtitle track’s header (the part to the left of the subtitle timeline), enter a label for the track. The label is what will display in the CC menu in the player. If you leave the field empty, the native name of the language you select will be used.
- Select its language to the right of the subtitle track's header.
- Double-click on an empty part of the track where you want the cue. This adds a 5-second long cue that starts at the clicked position.
- Add the subtitle text into the Text field of the Subtitles form
- To edit the start time, either click the Start Time field and edit it for the cue or hover over the white vertical line (the current start time for the cue) on the Subtitles track and click and drag it with your mouse to where you want to start the cue.
- Click Save. You can use the preview player to review your subtitles text.
- Click Remove Cue to delete the cue, if needed.
- Repeat steps 5 through 9 as needed.
Cues are shown on the Subtitles track as blue boxes (you must be zoomed in enough to see the boxes). When a cue is selected, its details are shown in the Subtitles form.
Cues cannot overlap, so if a text cue already spans across a point, it will be cut off and have its end point set to the same position as the new cue’s starting point.
A cue’s starting point and end point can also be changed by resizing the box on the timeline. Drag its left edge to change the starting point and its right edge to change the end point. The orange timeline cursor will follow as you move an edge so that you can see in the preview player that you find the correct point in the video.
In addition to the methods mentioned earlier, you can also create another subtitle track by duplicating an existing one. This is done by clicking on the copy icon to the right of the track. This is useful if you have a track with all the cues and timings set up and need to create an identical track, but for a different language.
Single track mode
If you’re only working on a single track, e.g. the chapters, or have many subtitle tracks and want to reduce clutter while working on any one of them, you may find the single track mode to be a better and more productive experience. In this mode, only one track will be displayed at a time. The timeline utilizes the full width of the editor and the chapters/text cues are bigger.
You can click on Switch to Single Track Mode under the Subtitles head.
Note: When working on a subtitle track in single track mode, importing from a .vtt file works differently than from multi track mode. Instead of adding a new track, it replaces all the text cues in the track you’re currently working on.
Manage subtitles in the files list
The subtitles for a video are listed in the videos' files list.
To access this list:
- Click Videos in the navigation.
- Select a video from the Videos list.
- Click Manage Files.
Here, you can upload new subtitle track files and edit the properties of the subtitle tracks through the Edit button for each file. This is an alternative to using the Edit Chapters and Subtitles editor if you already have the subtitles in .vtt files.
Technical information
Check these links for documentation and tools covering the WebVTT format.


