Configure Wowza Streaming Engine™ media server software to receive a live stream from a native RTP encoder, using an SDP file, and play the live stream over multiple streaming protocols. In order to pull an RTP stream from a native RTP encoder, Wowza Streaming Engine needs its session description information. This information is typically generated by the native RTP encoder as a Session Description Protocol (.sdp) file that you must upload to Wowza Streaming Engine.
Before you start
- Create a live streaming app.
1. Configure playback
Before connecting a live source and publishing a live stream, complete the following steps to configure playback support for your application.
- Click the Applications tab at the top of the page and then select your application in the contents panel.
- Click the Setup tab on your application's page and then click Edit.
- Under Playback Types, select any streaming protocols you need to support for playing streams sent to this application. The playback types enable transmuxing a source stream into MPEG-DASH, HLS, RTMP, and RTSP/RTP.
- Click Save.
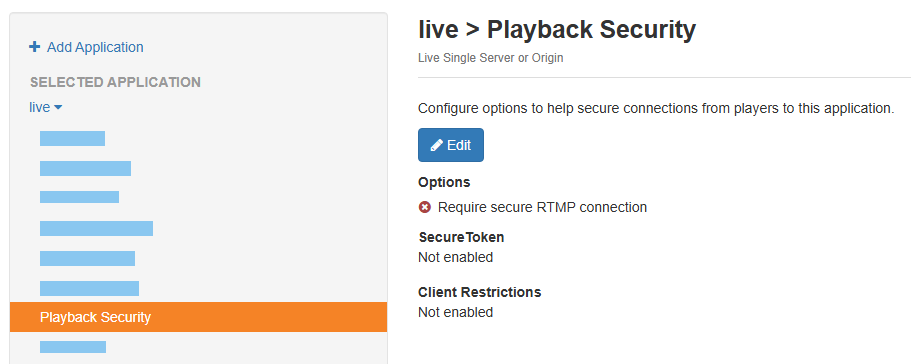
- In the application's contents panel, click Playback Security, and then click Edit. For more information about Playback Security options, see Playback security options.
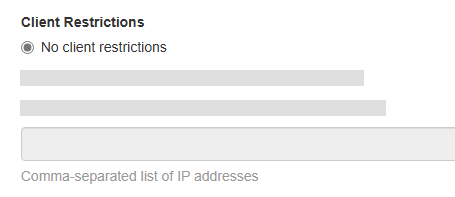
- Under Client restrictions, select No client restrictions to allow players to connect from any IP address.
- Click Save and then restart the application.


2. Connect to a source stream
To connect a native RTP-based source to Wowza Streaming Engine and publish a live stream, complete the following steps.
- Use the native RTP encoder's software to generate a Session Description Protocol (.sdp) file that describes the stream. For help, see the encoder's documentation.
- Name the file, for example myStream.sdp, and copy it to the [install-dir]/content folder on the server that runs Wowza Streaming Engine.
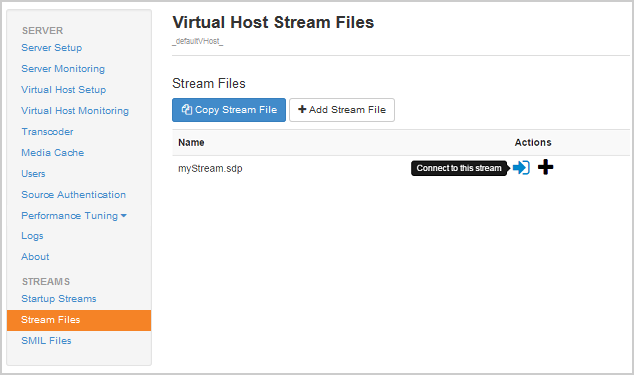
- In Wowza Streaming Engine Manager, click Server in the menu bar and then click Stream Files in the contents panel.
- Click the Connect icon your stream file.
- In the Connect a Stream File dialog box, click the Application Name menu and choose your application.
- Click the MediaCaster Type menu and choose rtp.
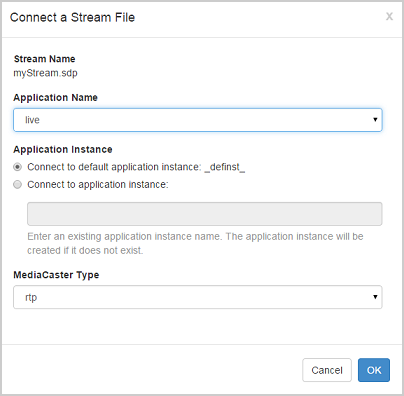
- Click OK.
The Connection successful notification displays.


3. Verify the connection
To verify that Wowza Streaming Engine is receiving the published stream, complete the following steps in Wowza Streaming Engine Manager.
- Click Incoming Streams in the contents panel for your live application. You should see your stream listed with Active for the status.
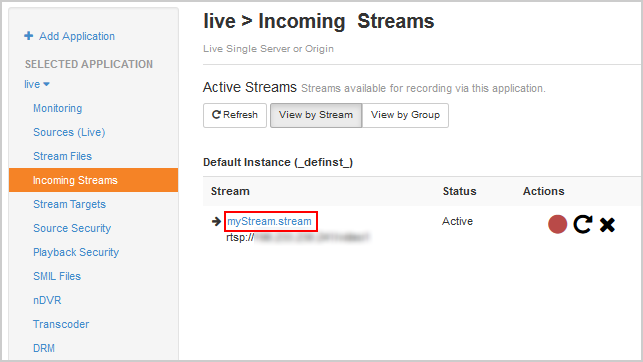
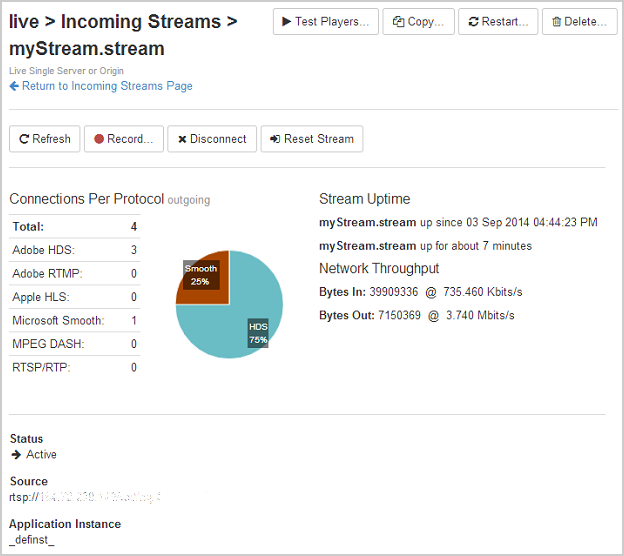
- Click the stream name to see the uptime, network throughput, and other information about the published stream.


4. Test playback
- From your application's page in Wowza Streaming Engine Manager, click Incoming Streams.
- Click the name of your stream and then click Test Playback from your stream's page.
- Review and, if needed, edit the following information in the Test Playback window for your stream:
- Server – The IP address or domain name of the server and the streaming port ([address]:[port]).
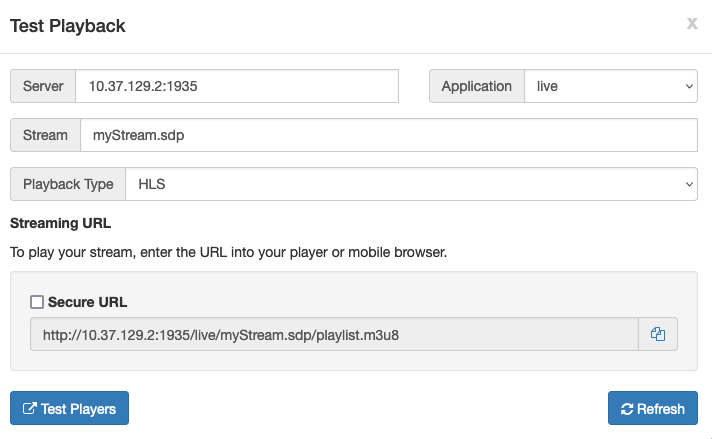
Note: The stream name should include the .sdp file extension.
- (Optional) In the Streaming URLs section, select Secure URL for the streaming protocol you want to use to test playback if you have configured SSL/TLS to stream over https, rtmps, or rtsps.
- Click the Copy icon for the streaming protocol you want to use to test playback.
- Paste the playback URL into your player or a mobile browser depending on the protocol. Alternatively, you can use the Wowza Video Test Players webpage.

For more information about playback URLs, see About playing Wowza Streaming Engine streams.


