Configure Wowza Streaming Engine™ media server software to receive an encoded live stream from an HLS-based source and play the live stream over multiple streaming protocols.
Note: Wowza Streaming Engine 4.5.0.01 or later is required.
Before you start
- Create a live streaming app.
1. Configure playback
Before connecting a live source and publishing a live stream, complete the following steps to configure playback support for your application.
- Click the Applications tab at the top of the page and then select your application in the contents panel.
- Click the Setup tab on your application's page and then click Edit.
- Under Playback Types, select any streaming protocols you need to support for playing streams sent to this application. The playback types enable transmuxing a source stream into MPEG-DASH, HLS, RTMP, and RTSP/RTP.
- Click Save.
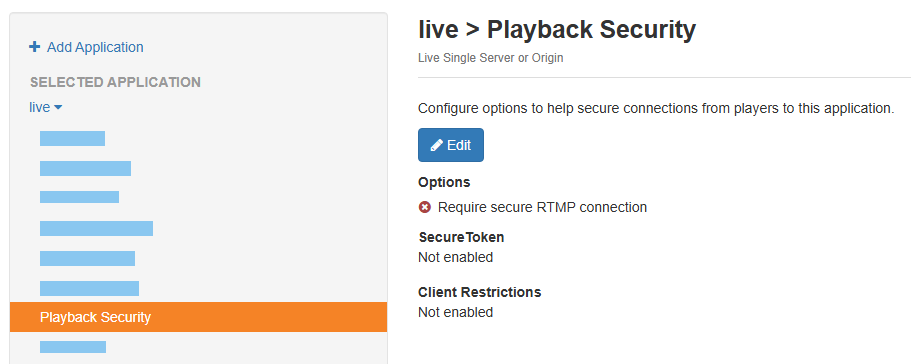
- In the application's contents panel, click Playback Security, and then click Edit. For more information about Playback Security options, see Playback security options.
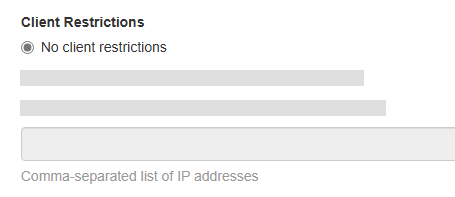
- Under Client restrictions, select No client restrictions to allow players to connect from any IP address.
- Click Save and then restart the application.


2. Connect to a source stream
This section provides the basic steps for creating a .stream file to publish the encoded live stream to Wowza Streaming Engine.
Notes:
- Consult your HLS encoder documentation for information about how to configure an outgoing live stream.
- Wowza Streaming Engine doesn't support query parameters, such as CDN authentication information, in stream URLs.
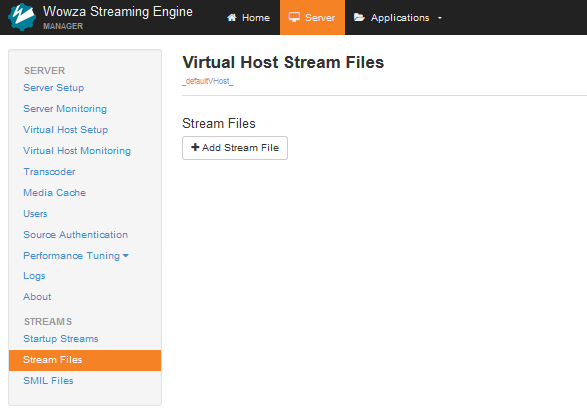
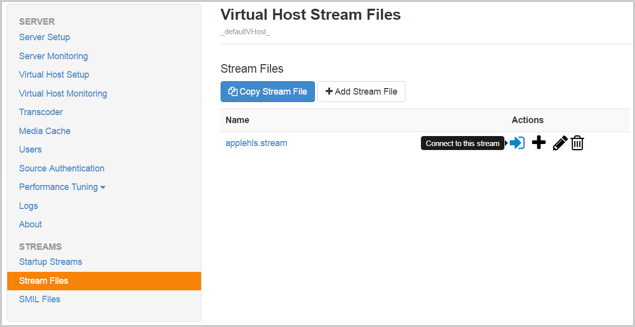
- In Wowza Streaming Engine Manager, click Server in the menu bar, click Stream Files in the contents panel, and then click Add Stream File.
- In the Add Stream File dialog box, enter a unique name for the stream file, for example, applehls.stream.
- For Stream URI, enter the URI of the HLS source to connect to, making sure it ends with the .m3u8 suffix.
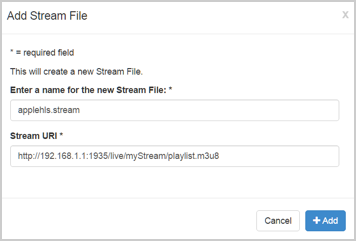
- Click Add.

When your source encoder is connected, start the stream.
- Click Stream Files in the contents panel and then click the Connect icon for your HLS .stream file.
- In the Connect a Stream File dialog box, click the Application Name menu and choose your application.
- Click the MediaCaster Type menu and choose applehls.
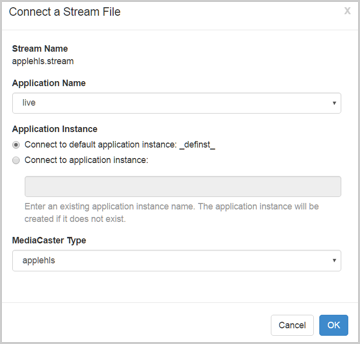
- Click OK.

The Connection successful notification displays.

3. Verify the connection
To verify that Wowza Streaming Engine is receiving the published stream, complete the following steps in Wowza Streaming Engine Manager.
- Click Incoming Streams in the contents panel for your live application. You should see your stream listed with Active for the status.
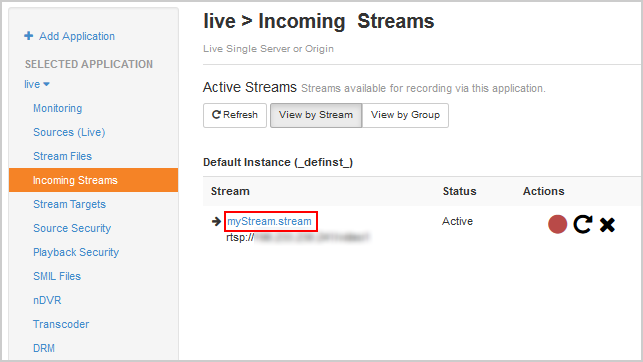
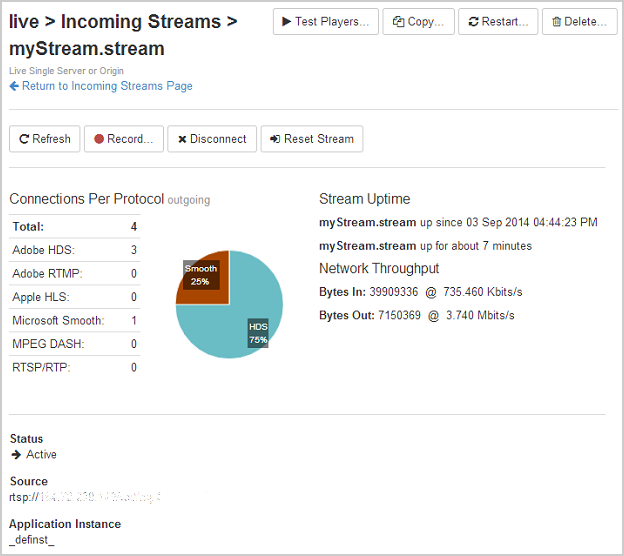
- Click the stream name to see the uptime, network throughput, and other information about the published stream.


4. Test playback
- In Wowza Streaming Engine Manager, in the contents panel for your application, click Stream Files.
- In the Stream Files list, click the name of your stream file.
- From your stream file's page, click Test Playback.
- Review and, if needed, edit the following information in the Test Playback window for your stream:
- Server – The IP address or domain name of the server and the streaming port ([address]:[port]).
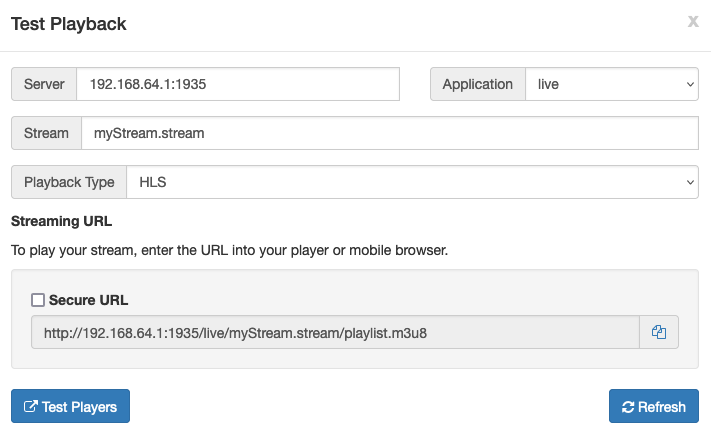
Note: The stream name should include the .stream file extension.
- (Optional) In the Streaming URLs section, select Secure URL for the streaming protocol you want to use to test playback if you have configured SSL/TLS for streaming over https, rtmps, or rtsps.
- Click the Copy icon for the streaming protocol you want to use to test playback.
- Paste the playback URL into your player or a mobile browser depending on the protocol. Alternatively, you can use the Wowza Video Test Players webpage. For more information about playback URLs, see About playing Wowza Streaming Engine streams.

5. (Optional) Debug HLS publishing
If you run into an issue with Wowza Streaming Engine ingesting an HLS live stream, enable the cupertinoMediaCasterDebug property to capture additional information in the logs.
Note: The cupertinoMediaCasterDebug property is turned off by default and should only be enabled for troubleshooting. Using it significantly increases the size of log files.
- Click the Applications tab and then click the name of your live application (such as live) in the contents panel.
- On the application page's Properties tab, click Custom in the Quick Links bar.
- In the Custom area, click Edit.
- Click Add Custom Property, specify the following settings in the Add Custom Property dialog box, and then click Add:
- Path - Select /Root/Application/MediaCaster.
- Name - Enter cupertinoMediaCasterDebug.
- Type - Select Boolean.
- Value - Enter true.
- Path - Select /Root/Application/MediaCaster.
- Click Save, and then restart the live application to apply the changes.


