A live source is an encoder or camera that publishes a live streams to Wowza Streaming Engine™ media server software. This article describes how to create connection settings and configure encoders to connect a live streaming app using WSE Manager.
Before you start
- Create a live streaming app.
Connect a live source
1. Authenticate live sources
By default, WSE requires that RTMP- and RTSP-based encoders provide a source username and password before they can connect to a live application and publish a live stream. Complete the following steps to create a source account and manage source authentication.
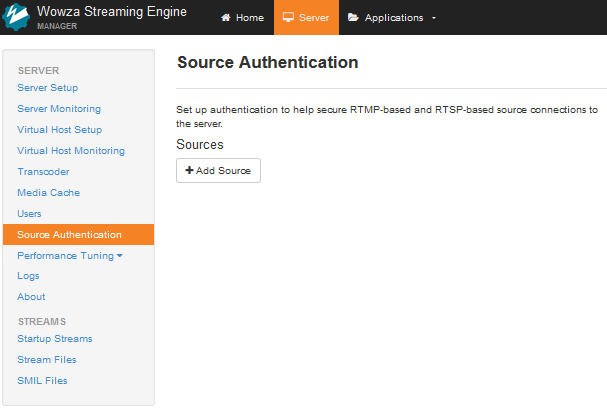
- In Wowza Streaming Engine Manager, click Server in the menu bar and then click Source Authentication in the contents panel.
- Click Add Source.
- Add Source User Name and Password information. The source user name and password values are case-sensitive and can only contain alphanumeric, period (.), underscore (_), and hyphen (-) characters.
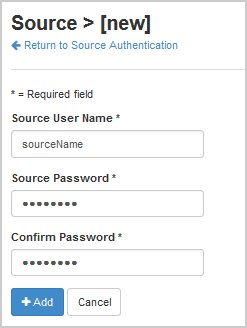
- Click Add.
A source account is used to authenticate connections from sources to live applications in Wowza Streaming Engine. You can create and store multiple source accounts for a Wowza Streaming Engine instance. By default, the source credentials are stored in [install-dir]/conf/publish.password.
- In your application's contents panel, click Source Security, and then click Edit.
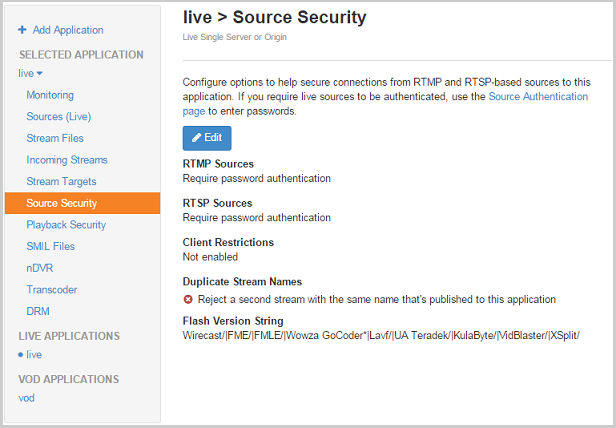


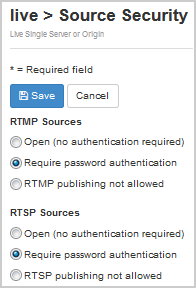
- Under your source type, select Require password authentication.
- (Optional) Under Client Restrictions, select one of the options to control which IP addresses encoders can connect from. Restricting source publishing to specific IP addresses or blocking source publishing from specific IP address is recommended for security purposes.
- Click Save and then restart the application.

For more information about Source Security options, see Secure incoming sources.
2. Configure playback
Before connecting a live source and publishing a live stream, complete the following steps to configure playback support for your application.
- Click the Applications tab at the top of the page and then select your application in the contents panel.
- Click the Setup tab on your application's page and then click Edit.
- Under Playback Types, select any streaming protocols you need to support for playing streams sent to this application. The playback types enable transmuxing a source stream into MPEG-DASH, HLS, RTMP, and RTSP/RTP.
- Click Save.
- In the application's contents panel, click Playback Security, and then click Edit. For more information about Playback Security options, see Playback security options.
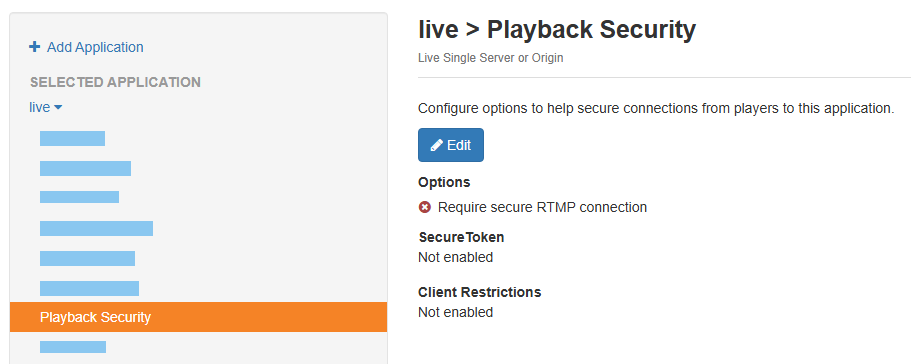
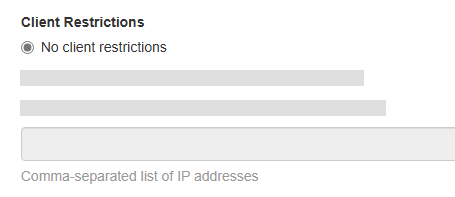
- Under Client restrictions, select No client restrictions to allow players to connect from any IP address.
- Click Save and then restart the application.


3. Connect to a source
WSE Manager includes integrations with many common encoders, but many other encoders can also easily connect to live applications in Wowza Streaming Engine. For encoders that are not integrated, you must manually enter application connection settings in the encoder configuration.
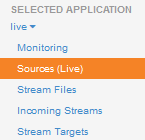
- In your application's contents panel, click Sources (Live).
- Configure your live source:
- If your encoder is listed on the Sources (Live) page, select it and then enter the information requested and follow the prompts to set up your source.
Depending on your encoder, you may need to provide the following information:
- Host - Server IP address or port – The default streaming host port settings (IP address and port) for the virtual host (VHost). By default, Wowza Streaming Engine uses TCP port 1935 for all forms of streaming. To change streaming host port settings for the VHost, go to the Virtual Host Setup page in Wowza Streaming Engine Manager.
- Stream Name – A unique name for the incoming stream, which does not contain less-than (<), greater-than (>), colon (:), quotation (' and "), forward slash (/), backslash (), pipe (|), question mark (?), asterisk (*), double-dot (..), and tilde (~) characters.
- Source user name – The name of a source account in Wowza Streaming Engine to be used if you configured your application to require source authentication for RTMP or RTSP/RTP sources.
- Camera IP address, port, or credentials – The network address or domain, port, and credentials of the source camera.
- Pan/Tilt/Zoom (PTZ) credentials – The camera's username and password to allow access to its PTZ controls from the Incoming Streams page in Wowza Streaming Engine Manager.
- If your encoder is not listed on the Sources (Live) page, see the Application Connection Settings information in the right panel and use this information in your encoder's configuration to connect it to Wowza Streaming Engine.
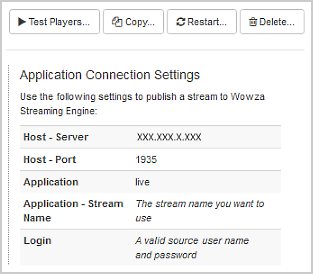
- Server and Port – The default streaming host port settings (IP address and port) for the virtual host (VHost). By default, Wowza Streaming Engine uses TCP port 1935 for all forms of streaming. To change streaming host port settings for the VHost, go to the Virtual Host Setup page in Wowza Streaming Engine Manager.
- Application – The name of the application.
- Stream Name – The name of the incoming live stream. You must specify the stream name in your encoder configuration.
- Login – A username and password for a source account. If the application requires that source connections be authenticated with a password (the default setting), you must enter a source user name and password for a source account in your encoder configuration to connect. If the application doesn't require that source connections be authenticated, the login information isn't required.
- Server and Port – The default streaming host port settings (IP address and port) for the virtual host (VHost). By default, Wowza Streaming Engine uses TCP port 1935 for all forms of streaming. To change streaming host port settings for the VHost, go to the Virtual Host Setup page in Wowza Streaming Engine Manager.
- If your encoder is listed on the Sources (Live) page, select it and then enter the information requested and follow the prompts to set up your source.
- From your camera or encoder, start your live stream.


4. Verify the connection
To verify that Wowza Streaming Engine is receiving the published stream, complete the following steps in Wowza Streaming Engine Manager.
- Click Incoming Streams in the contents panel for your live application. You should see your stream listed with Active for the status.
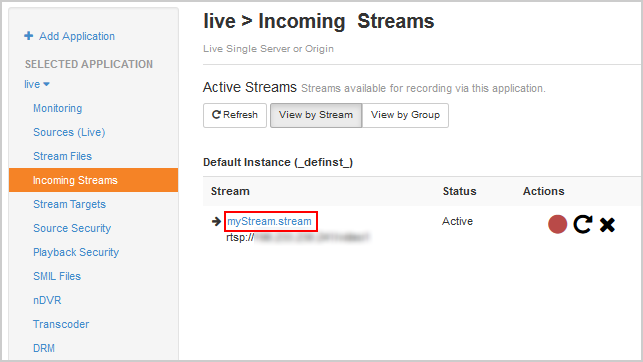
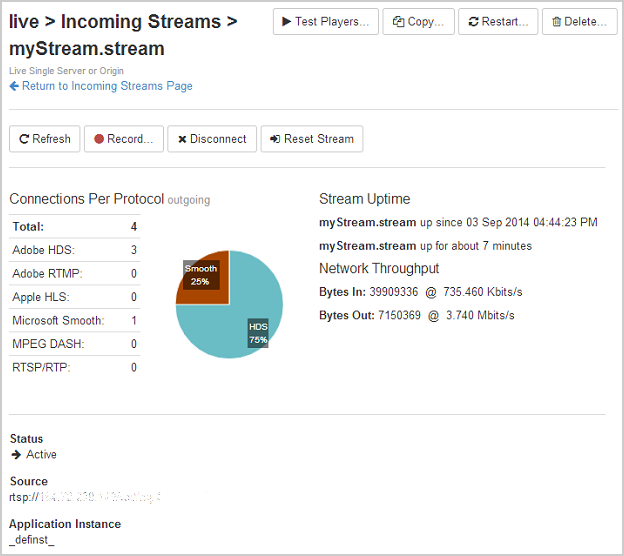
- Click the stream name to see the uptime, network throughput, and other information about the published stream.


5. Test playback
- From your application's page in Wowza Streaming Engine Manager, click Incoming Streams.
- Click the name of your stream and then click Test Playback from your stream's page.
- Review and, if needed, edit the following information in the Test Playback window for your stream:
- Server – The IP address or domain name of the server and the streaming port ([address]:[port]).
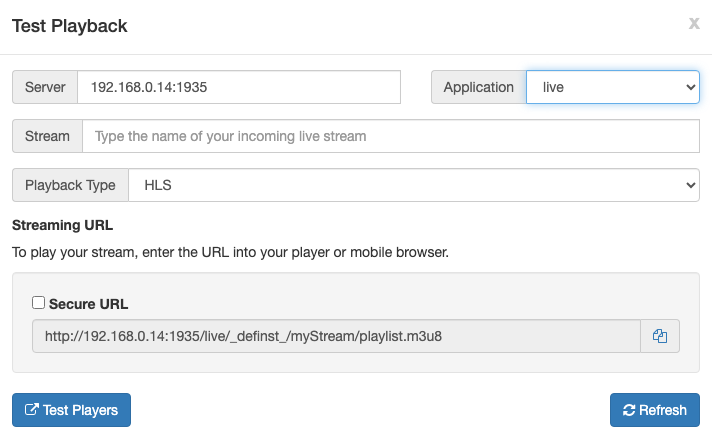
- (Optional) In the Streaming URLs section, select Secure URL for the streaming protocol you want to use to test playback if you have configured SSL/TLS for streaming over https, rtmps, or rtsps.
- Click the Copy icon for the streaming protocol you want to use to test playback.
- Paste the playback URL into your player or a mobile browser depending on the protocol. Alternatively, you can use the Wowza Video Test Players webpage.

For more information about playback URLs, see About playing Wowza Streaming Engine streams.


